Table of Contents
Virtual Machine Installation Wiki Tutorial
Download and Install Virtual Machine Software
For a home installation you must have a computer that supports a virtual machine. Download and install one of the following virtualization software packages. For this tutorial we will be using Oracle's VirtualBox(free). Read the instructions on the site to determine the appropriate download for your machine. Click on the link and wait for the download to complete.
https://www.virtualbox.org/wiki/Downloads
https://www.vmware.com/products/workstation-player.html
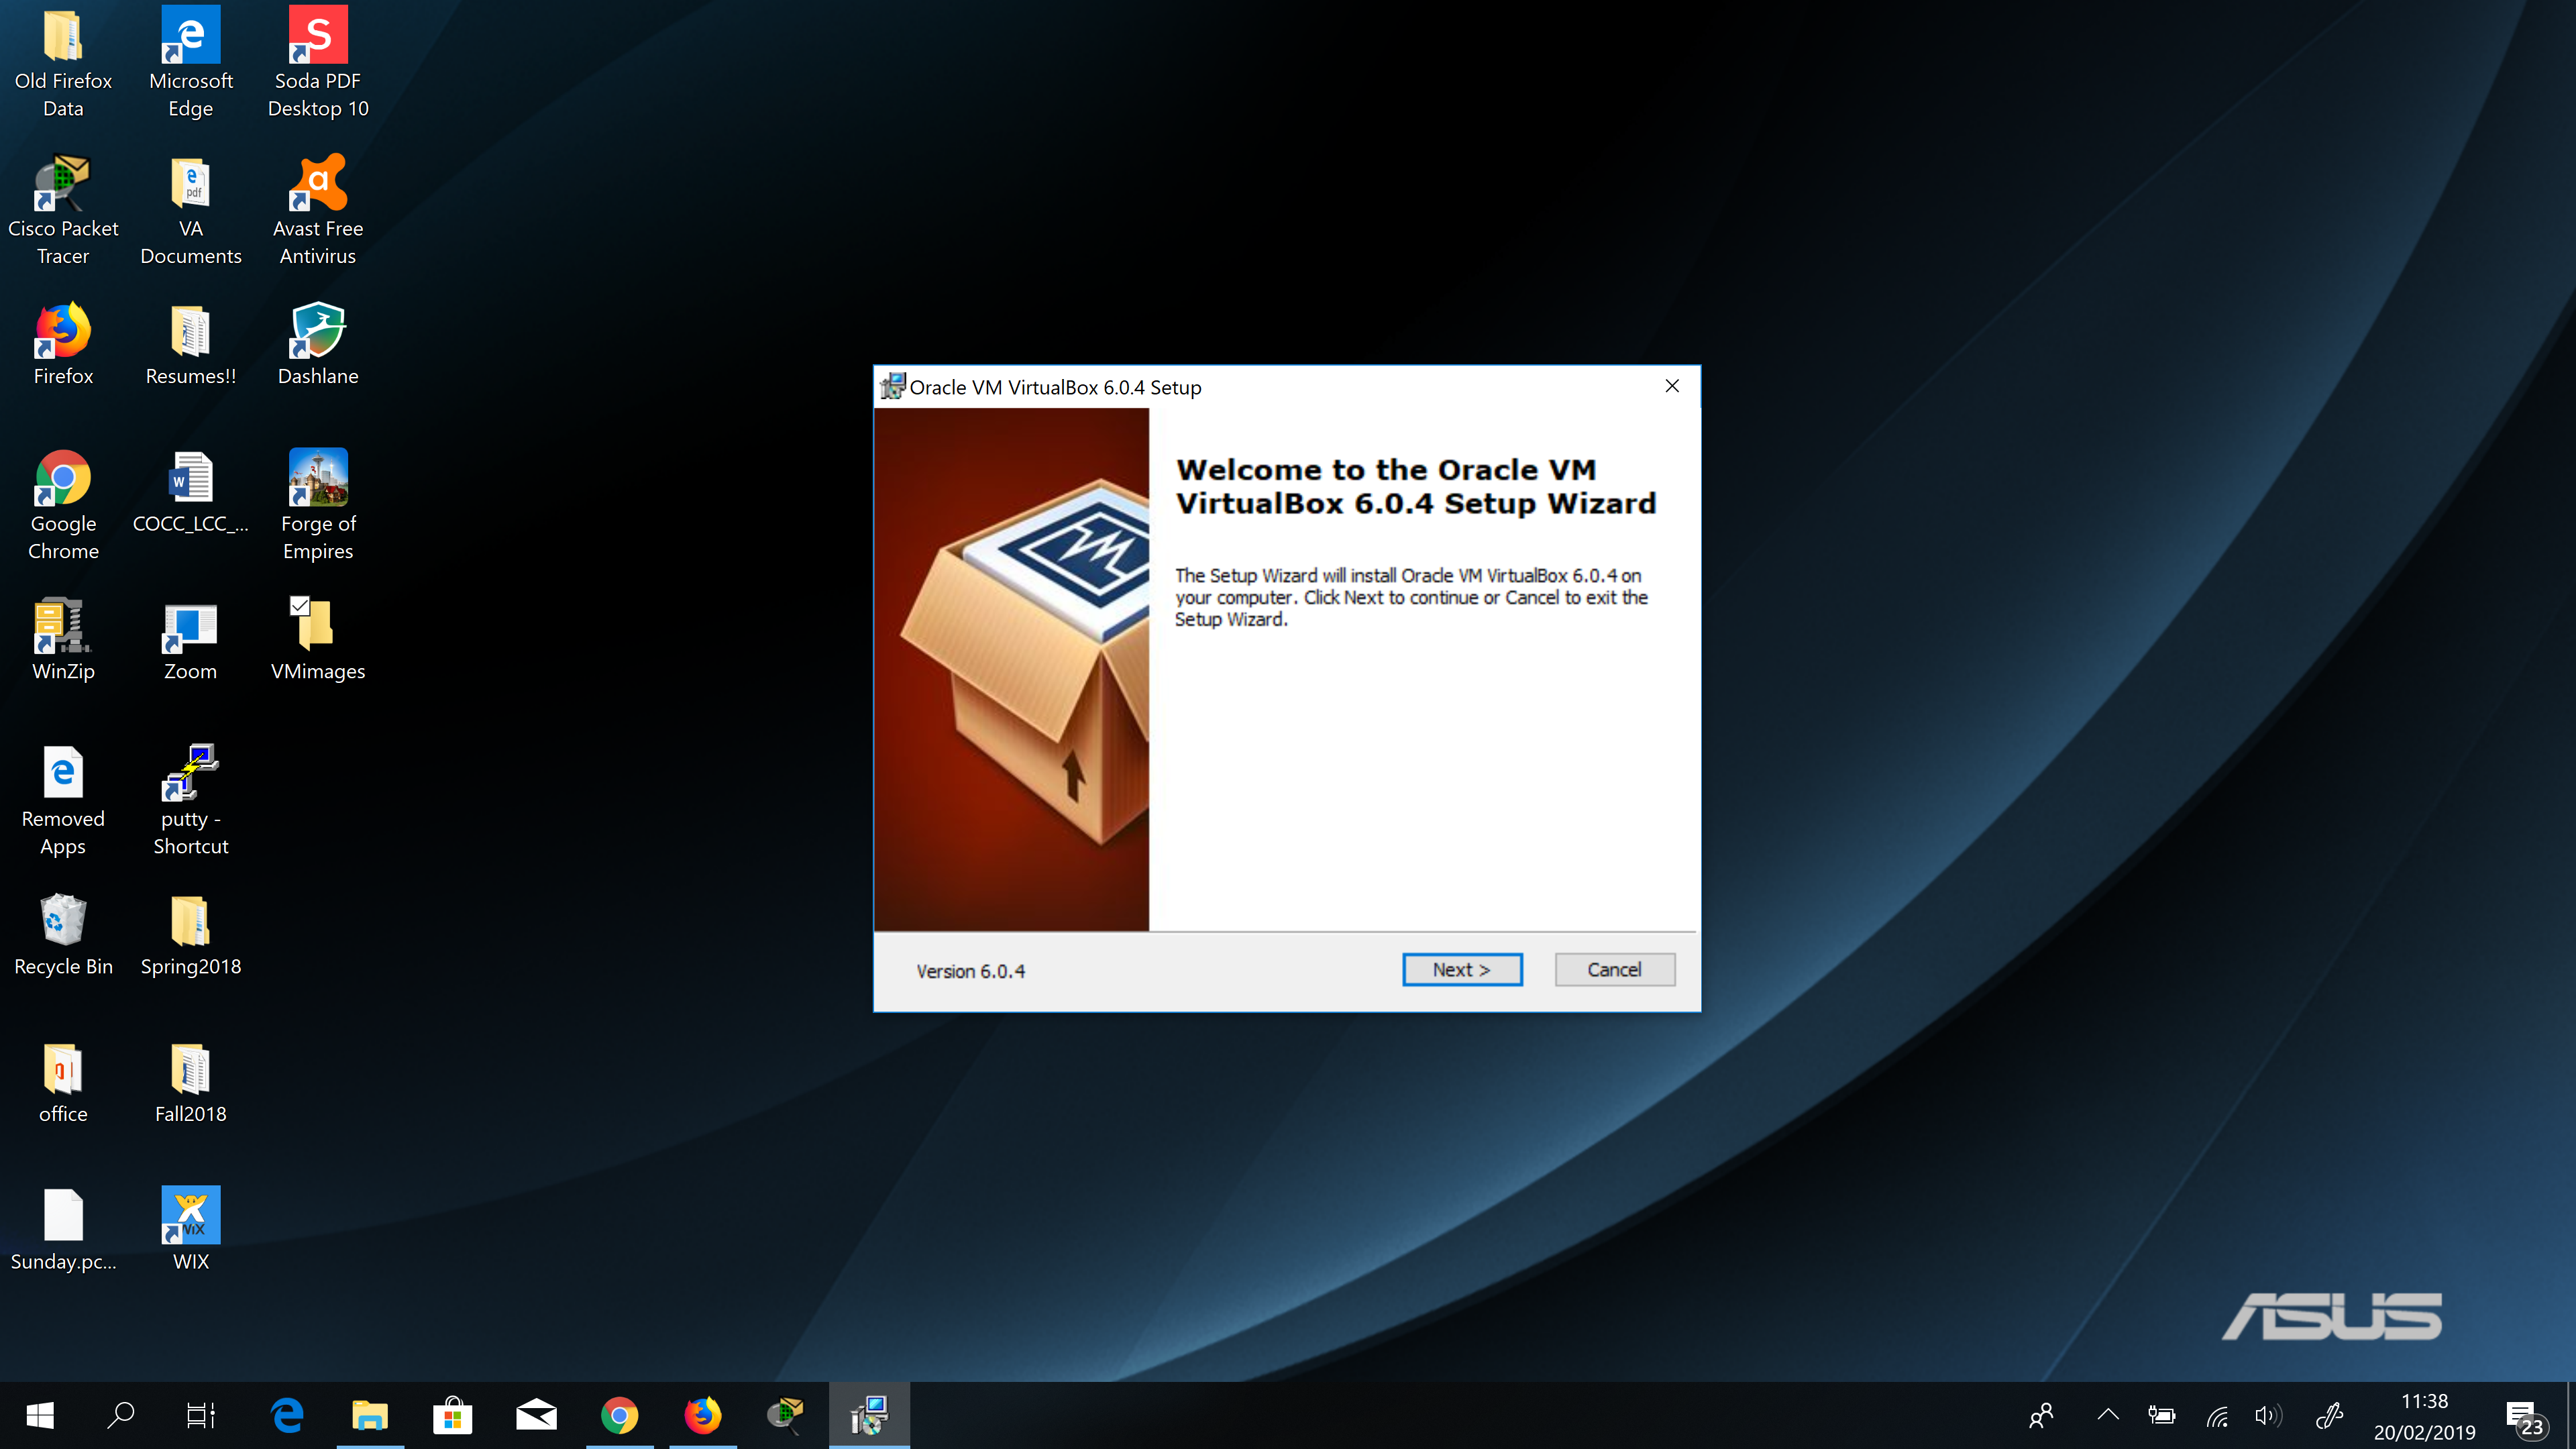
Once you have selected the version of software and the download is complete the install wizard should open automatically, if not then navigate to your downloads directory/folder and double-click or open the downloaded application, it should be an executable file and automatically start to run an installation wizard. The window with the setup wizard should look something similar to the image below.
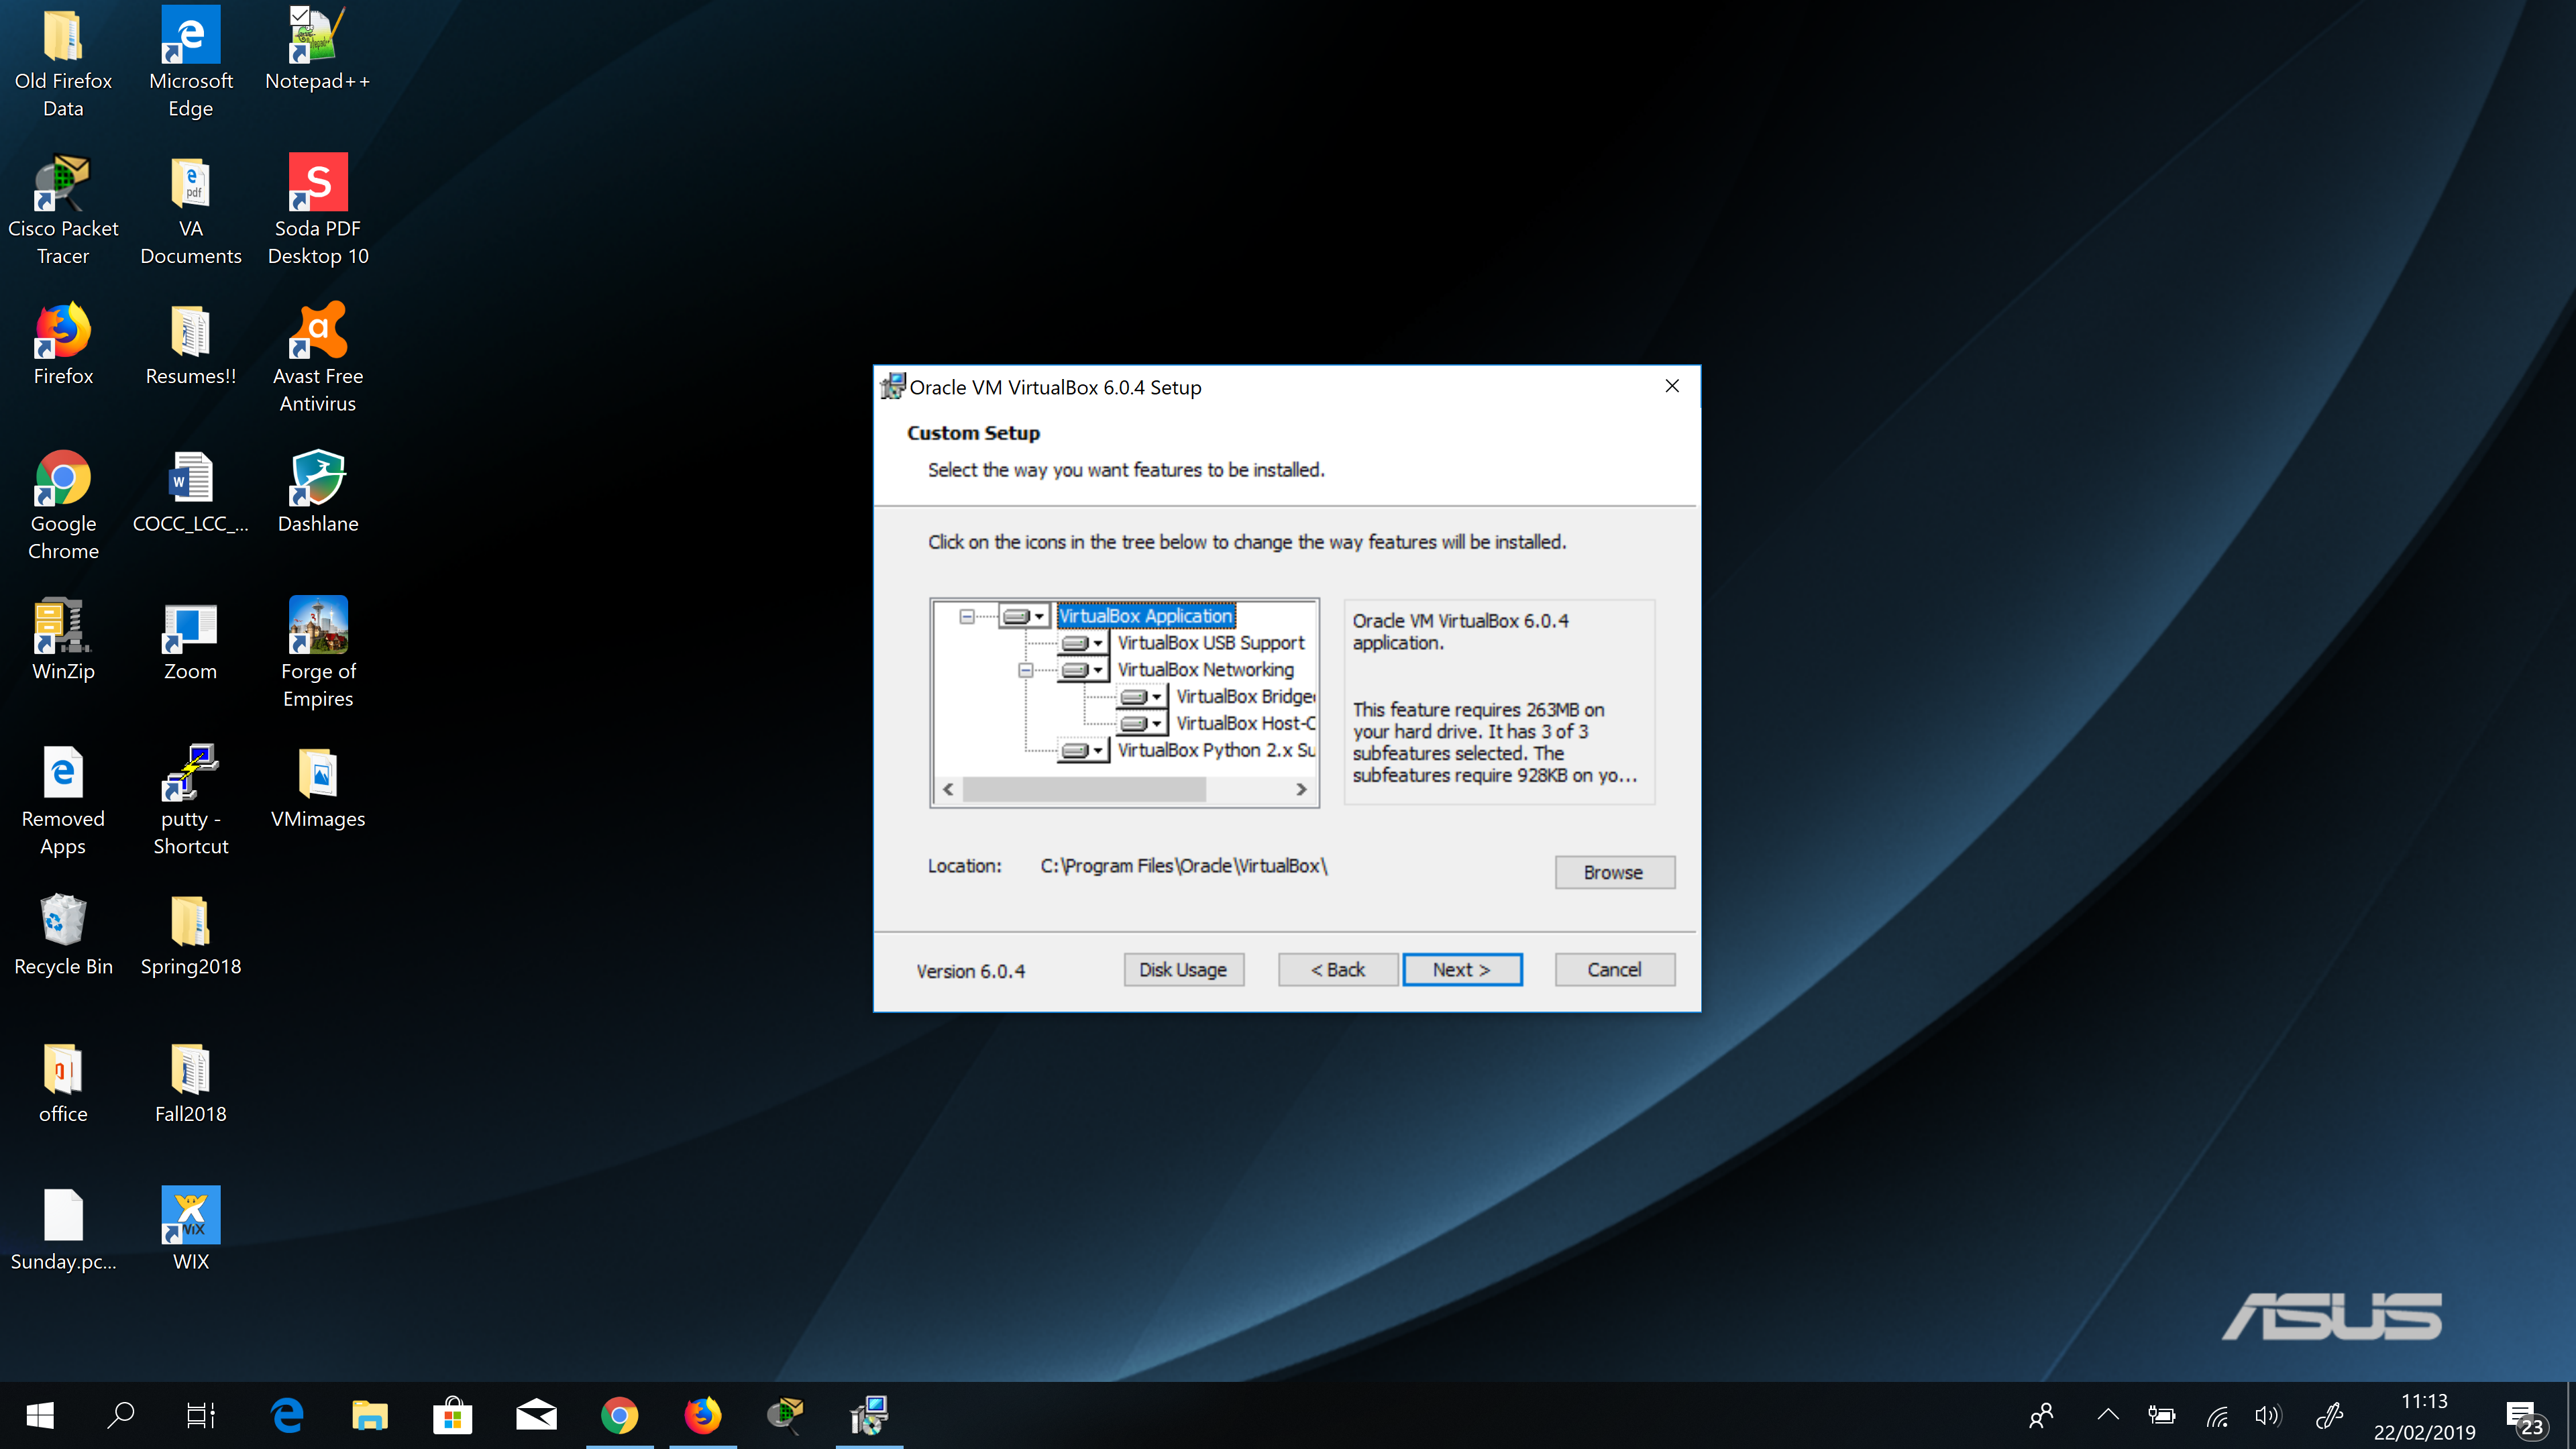
You should be able to continue clicking the next button or a similarly named button on each subsequent screen to install the default configuration for VirtualBox. Disk usage space required is 406MB for the default custom installation. If you have multiple drives on your machine you may want to specify to which drive you would like to install VirtualBox. In that case you should click on the button that is used for allocating disk usage as shown in the following image.
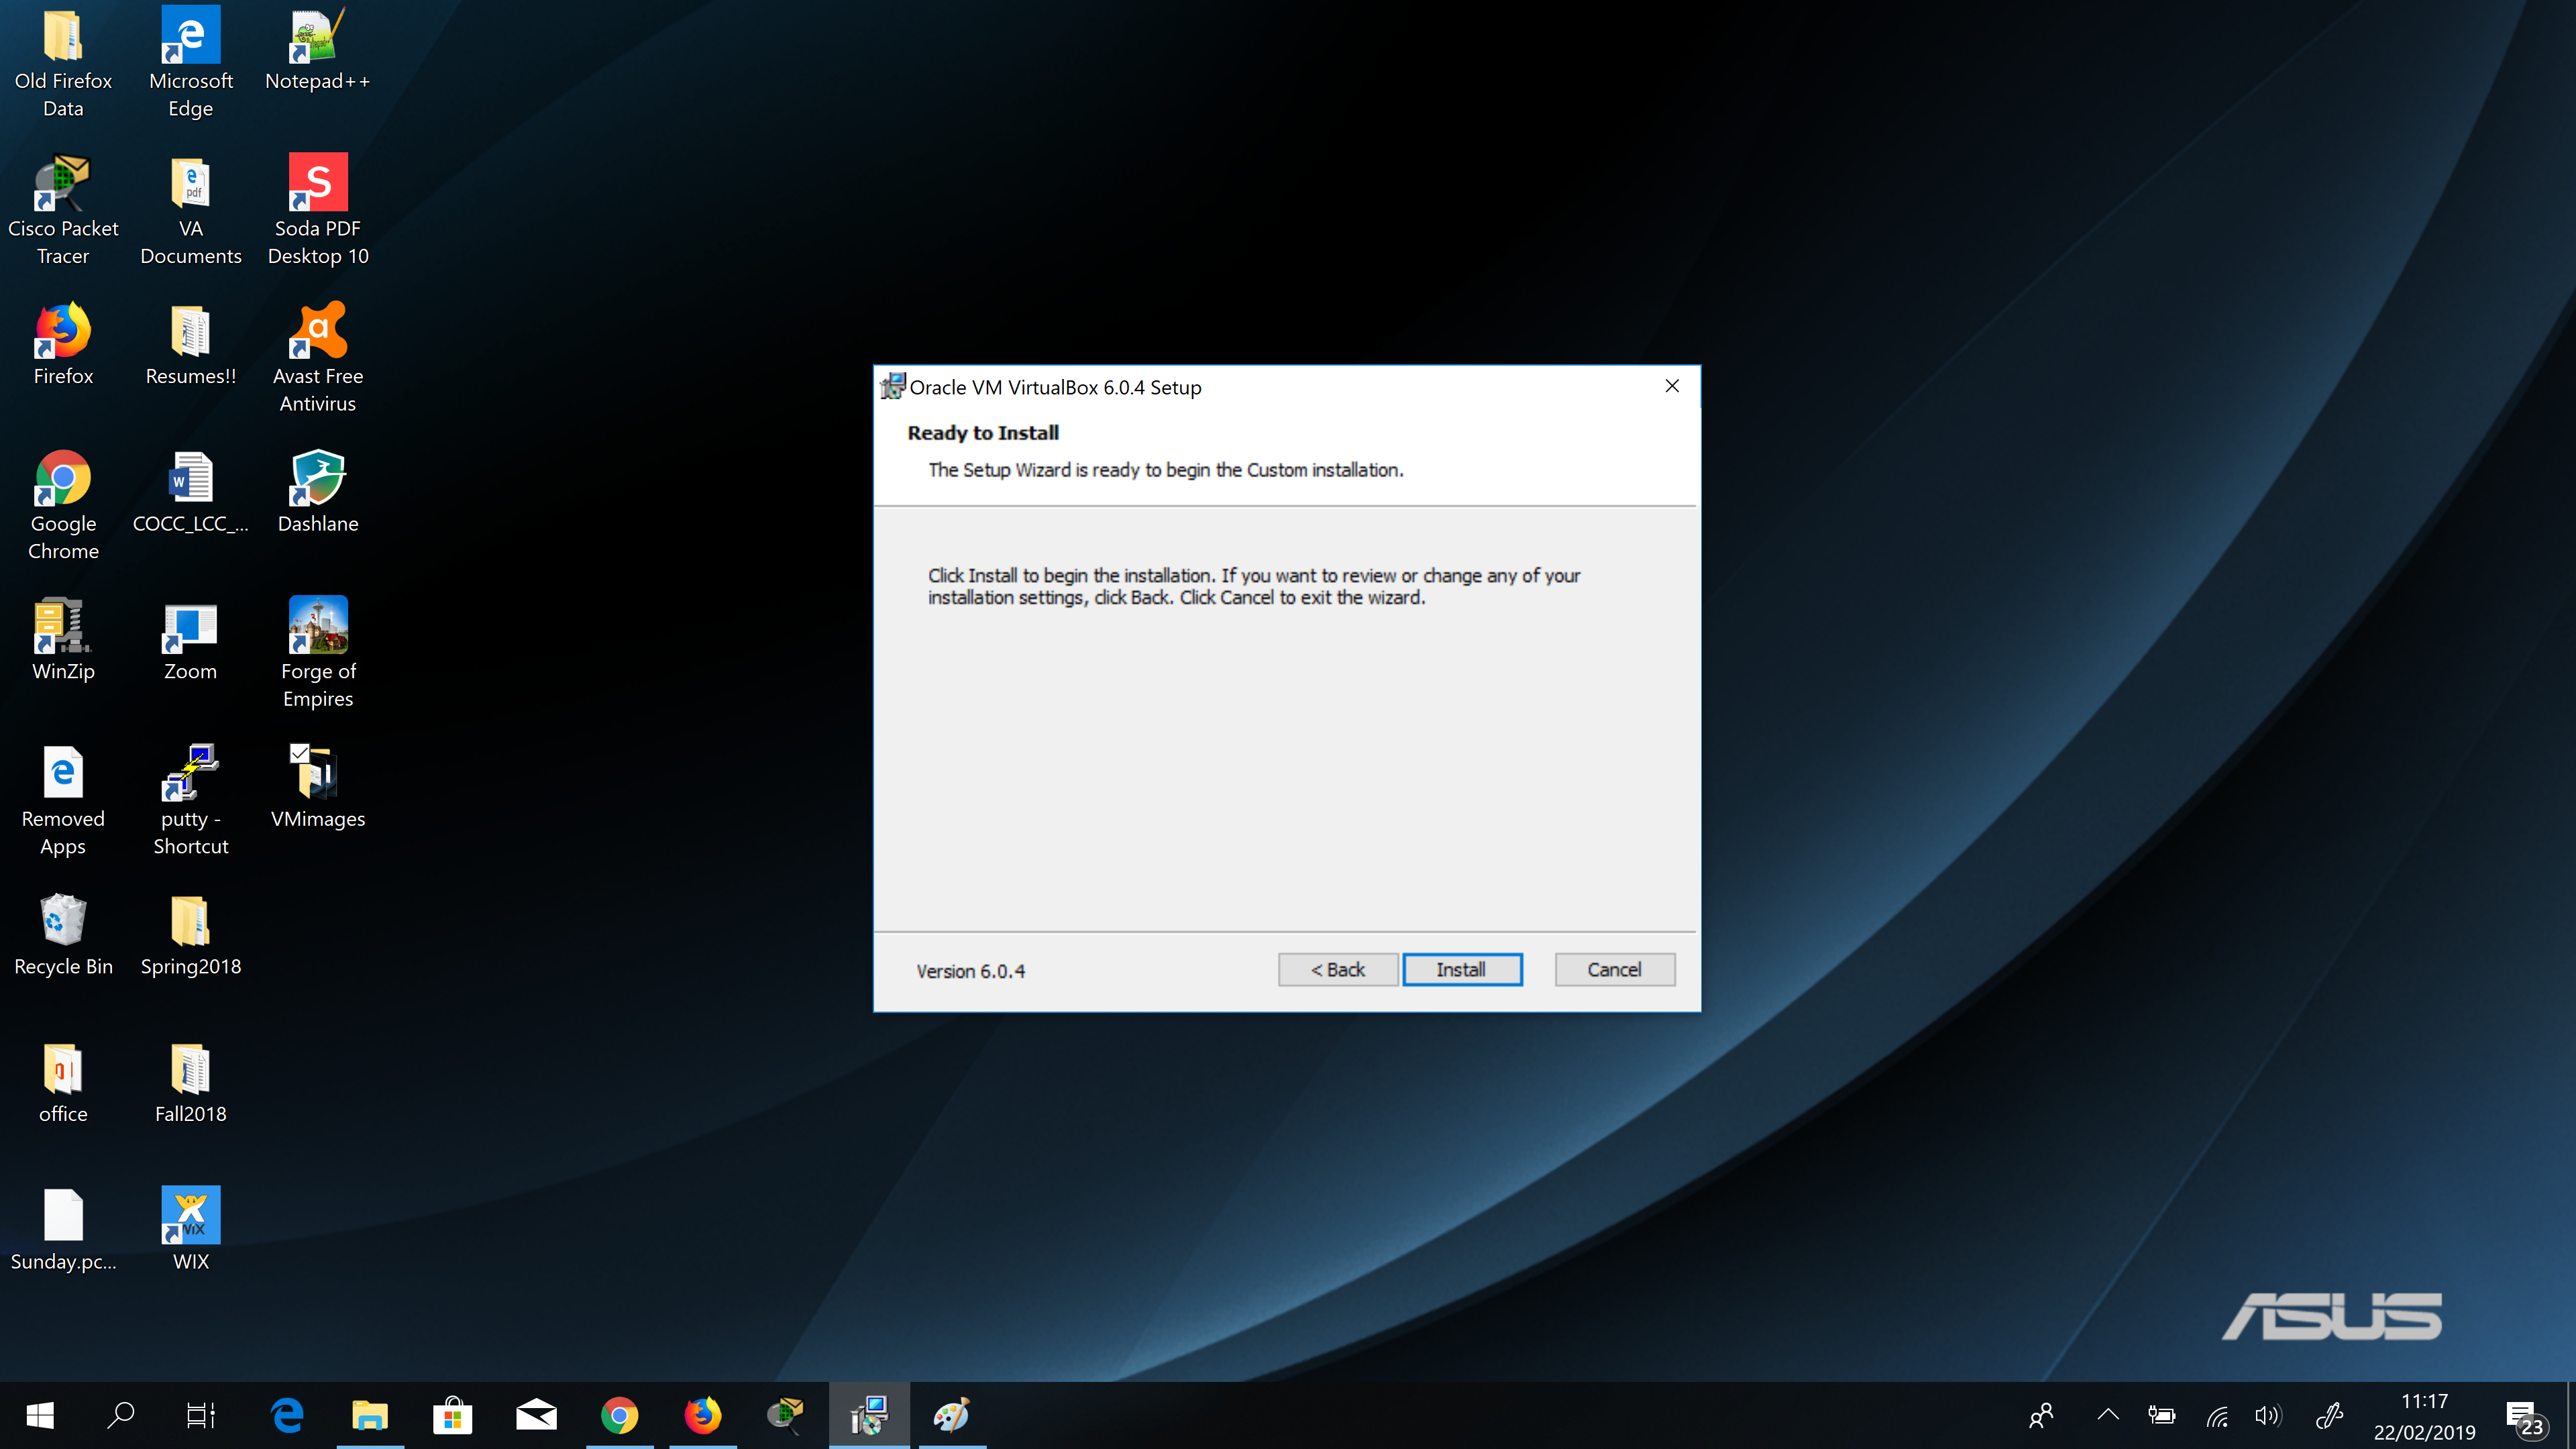
Continue clicking next, when you arrive at the “NETWORK INTERFACES” warning screen continue through that. You will come to a screen that prompts you to select an install button, click on it. This will begin your installation of your virtual machine on your physical machine.
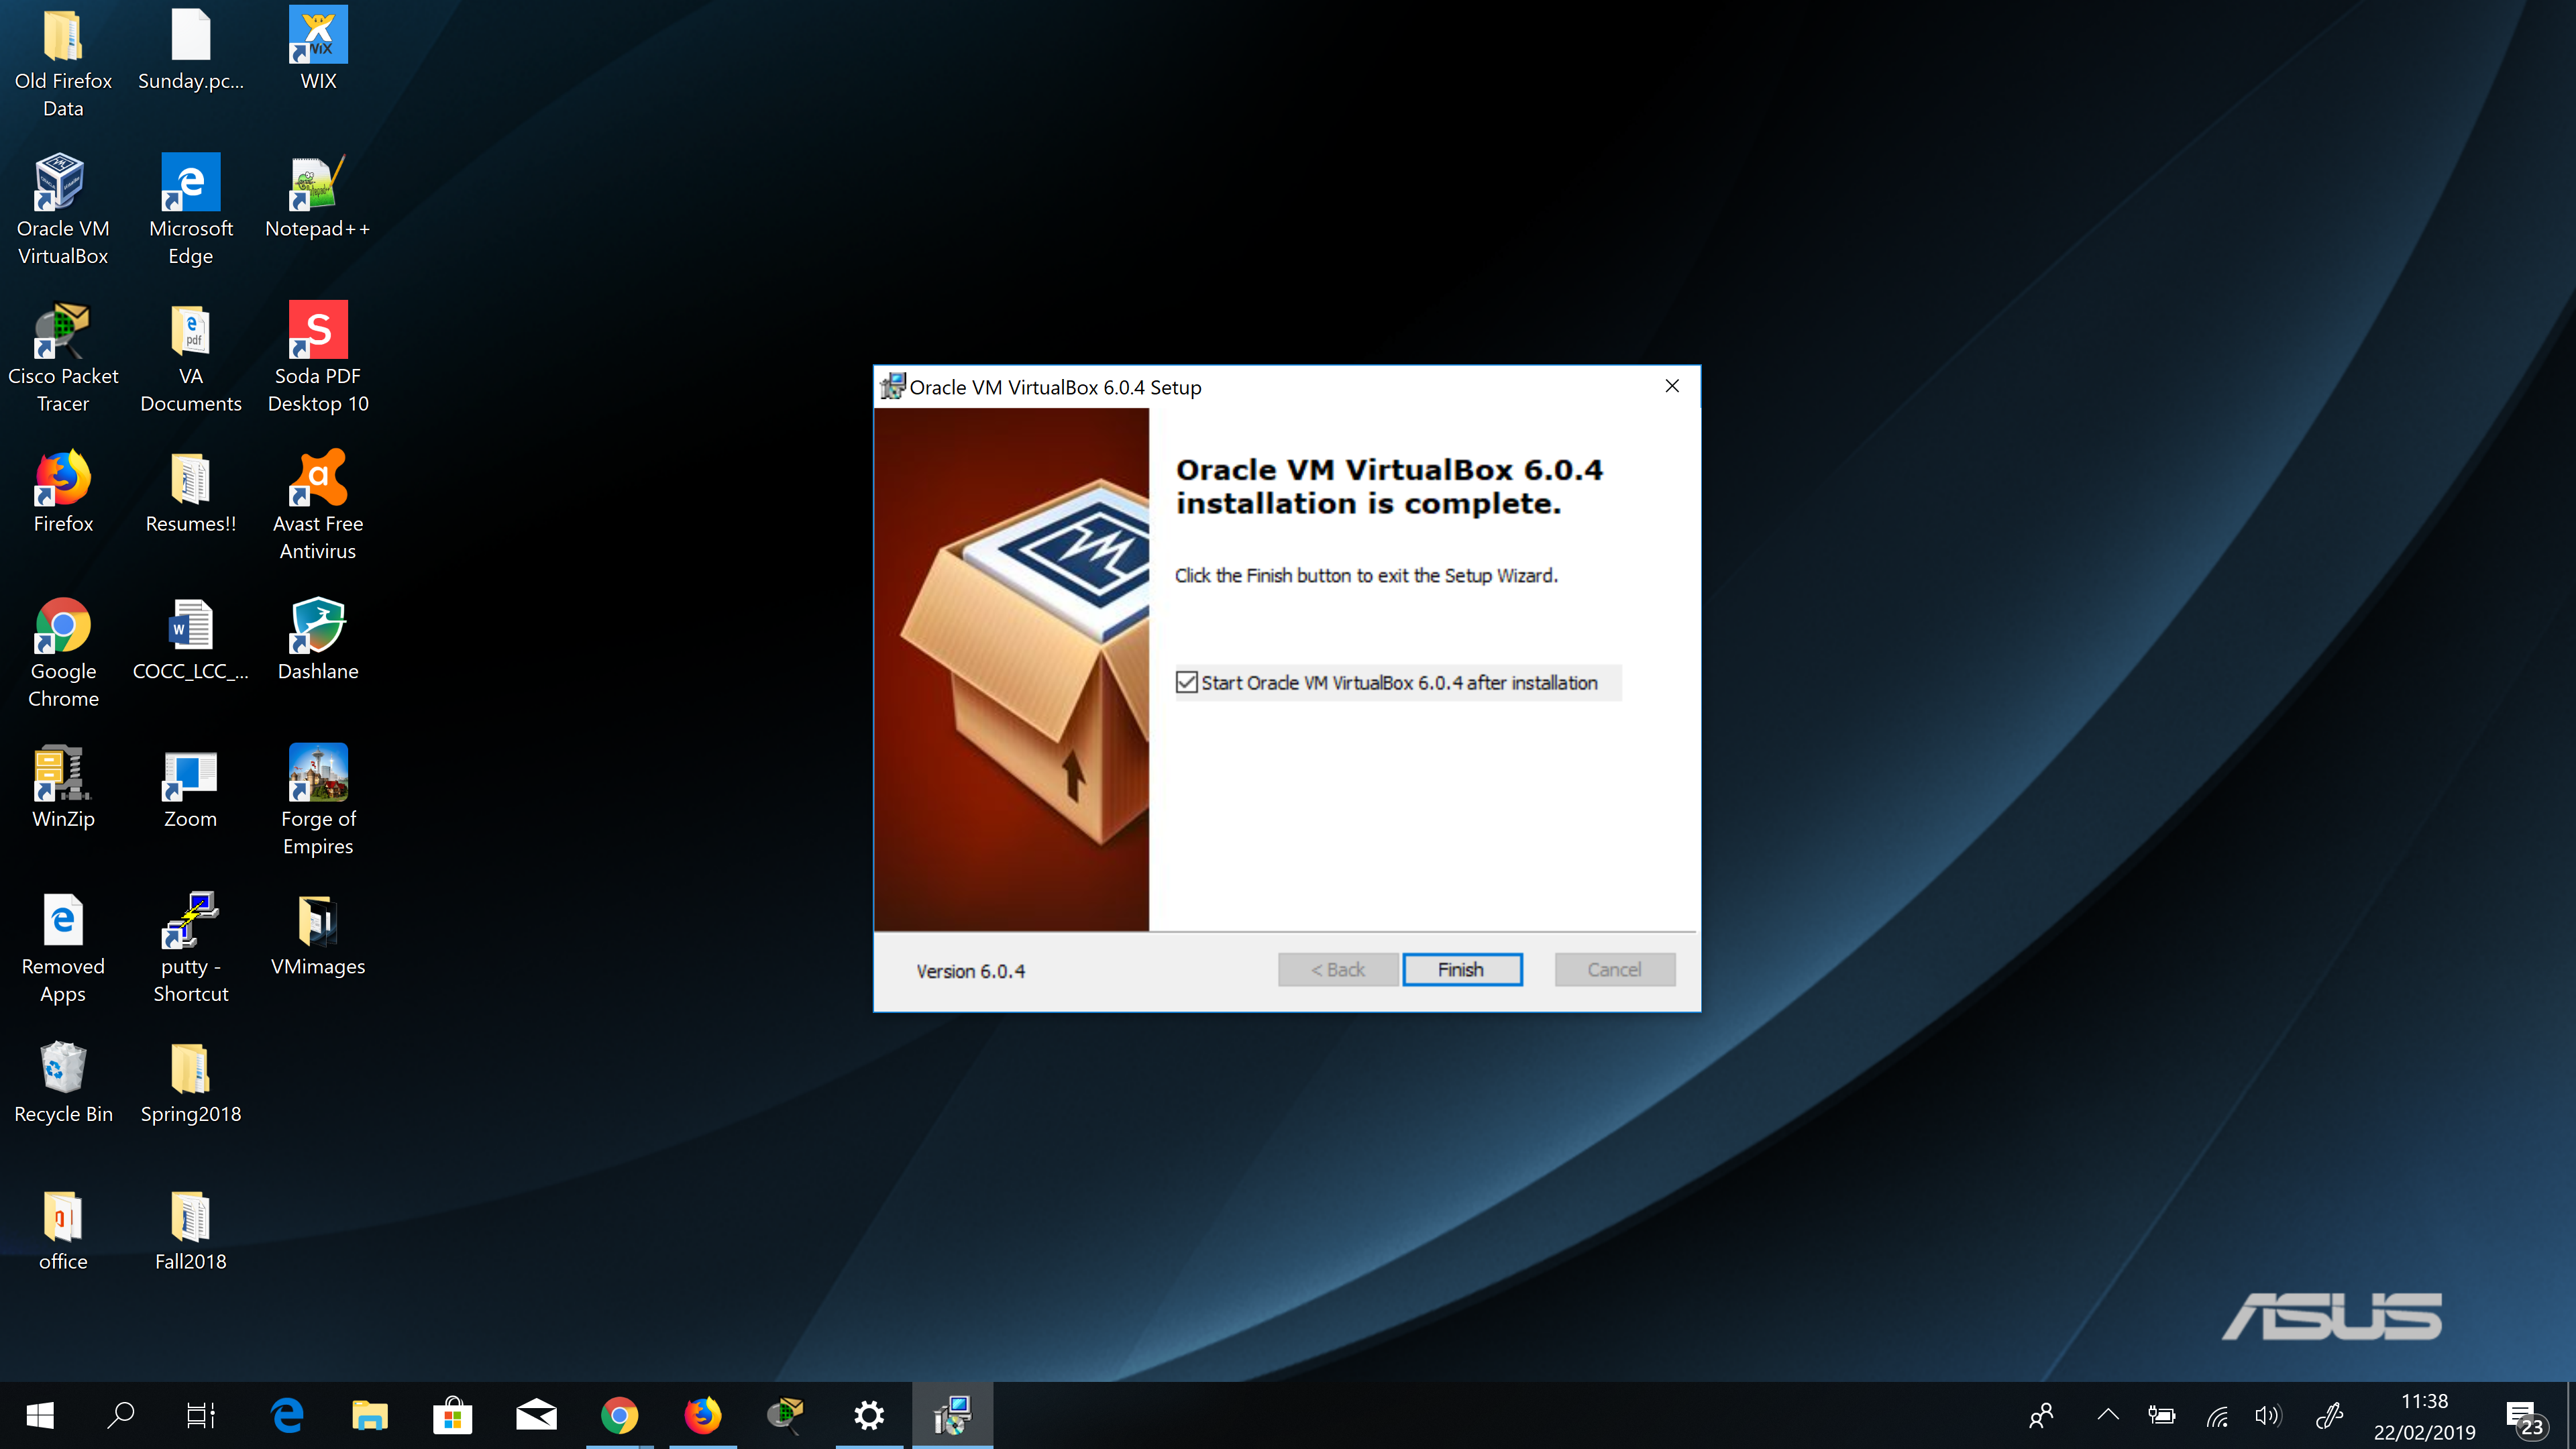
The last screen you will see will be similar to the one below, click on the finish button and your installation will be complete. The next step is configuring your virtual machine.
Configuring Your Virtual Machine
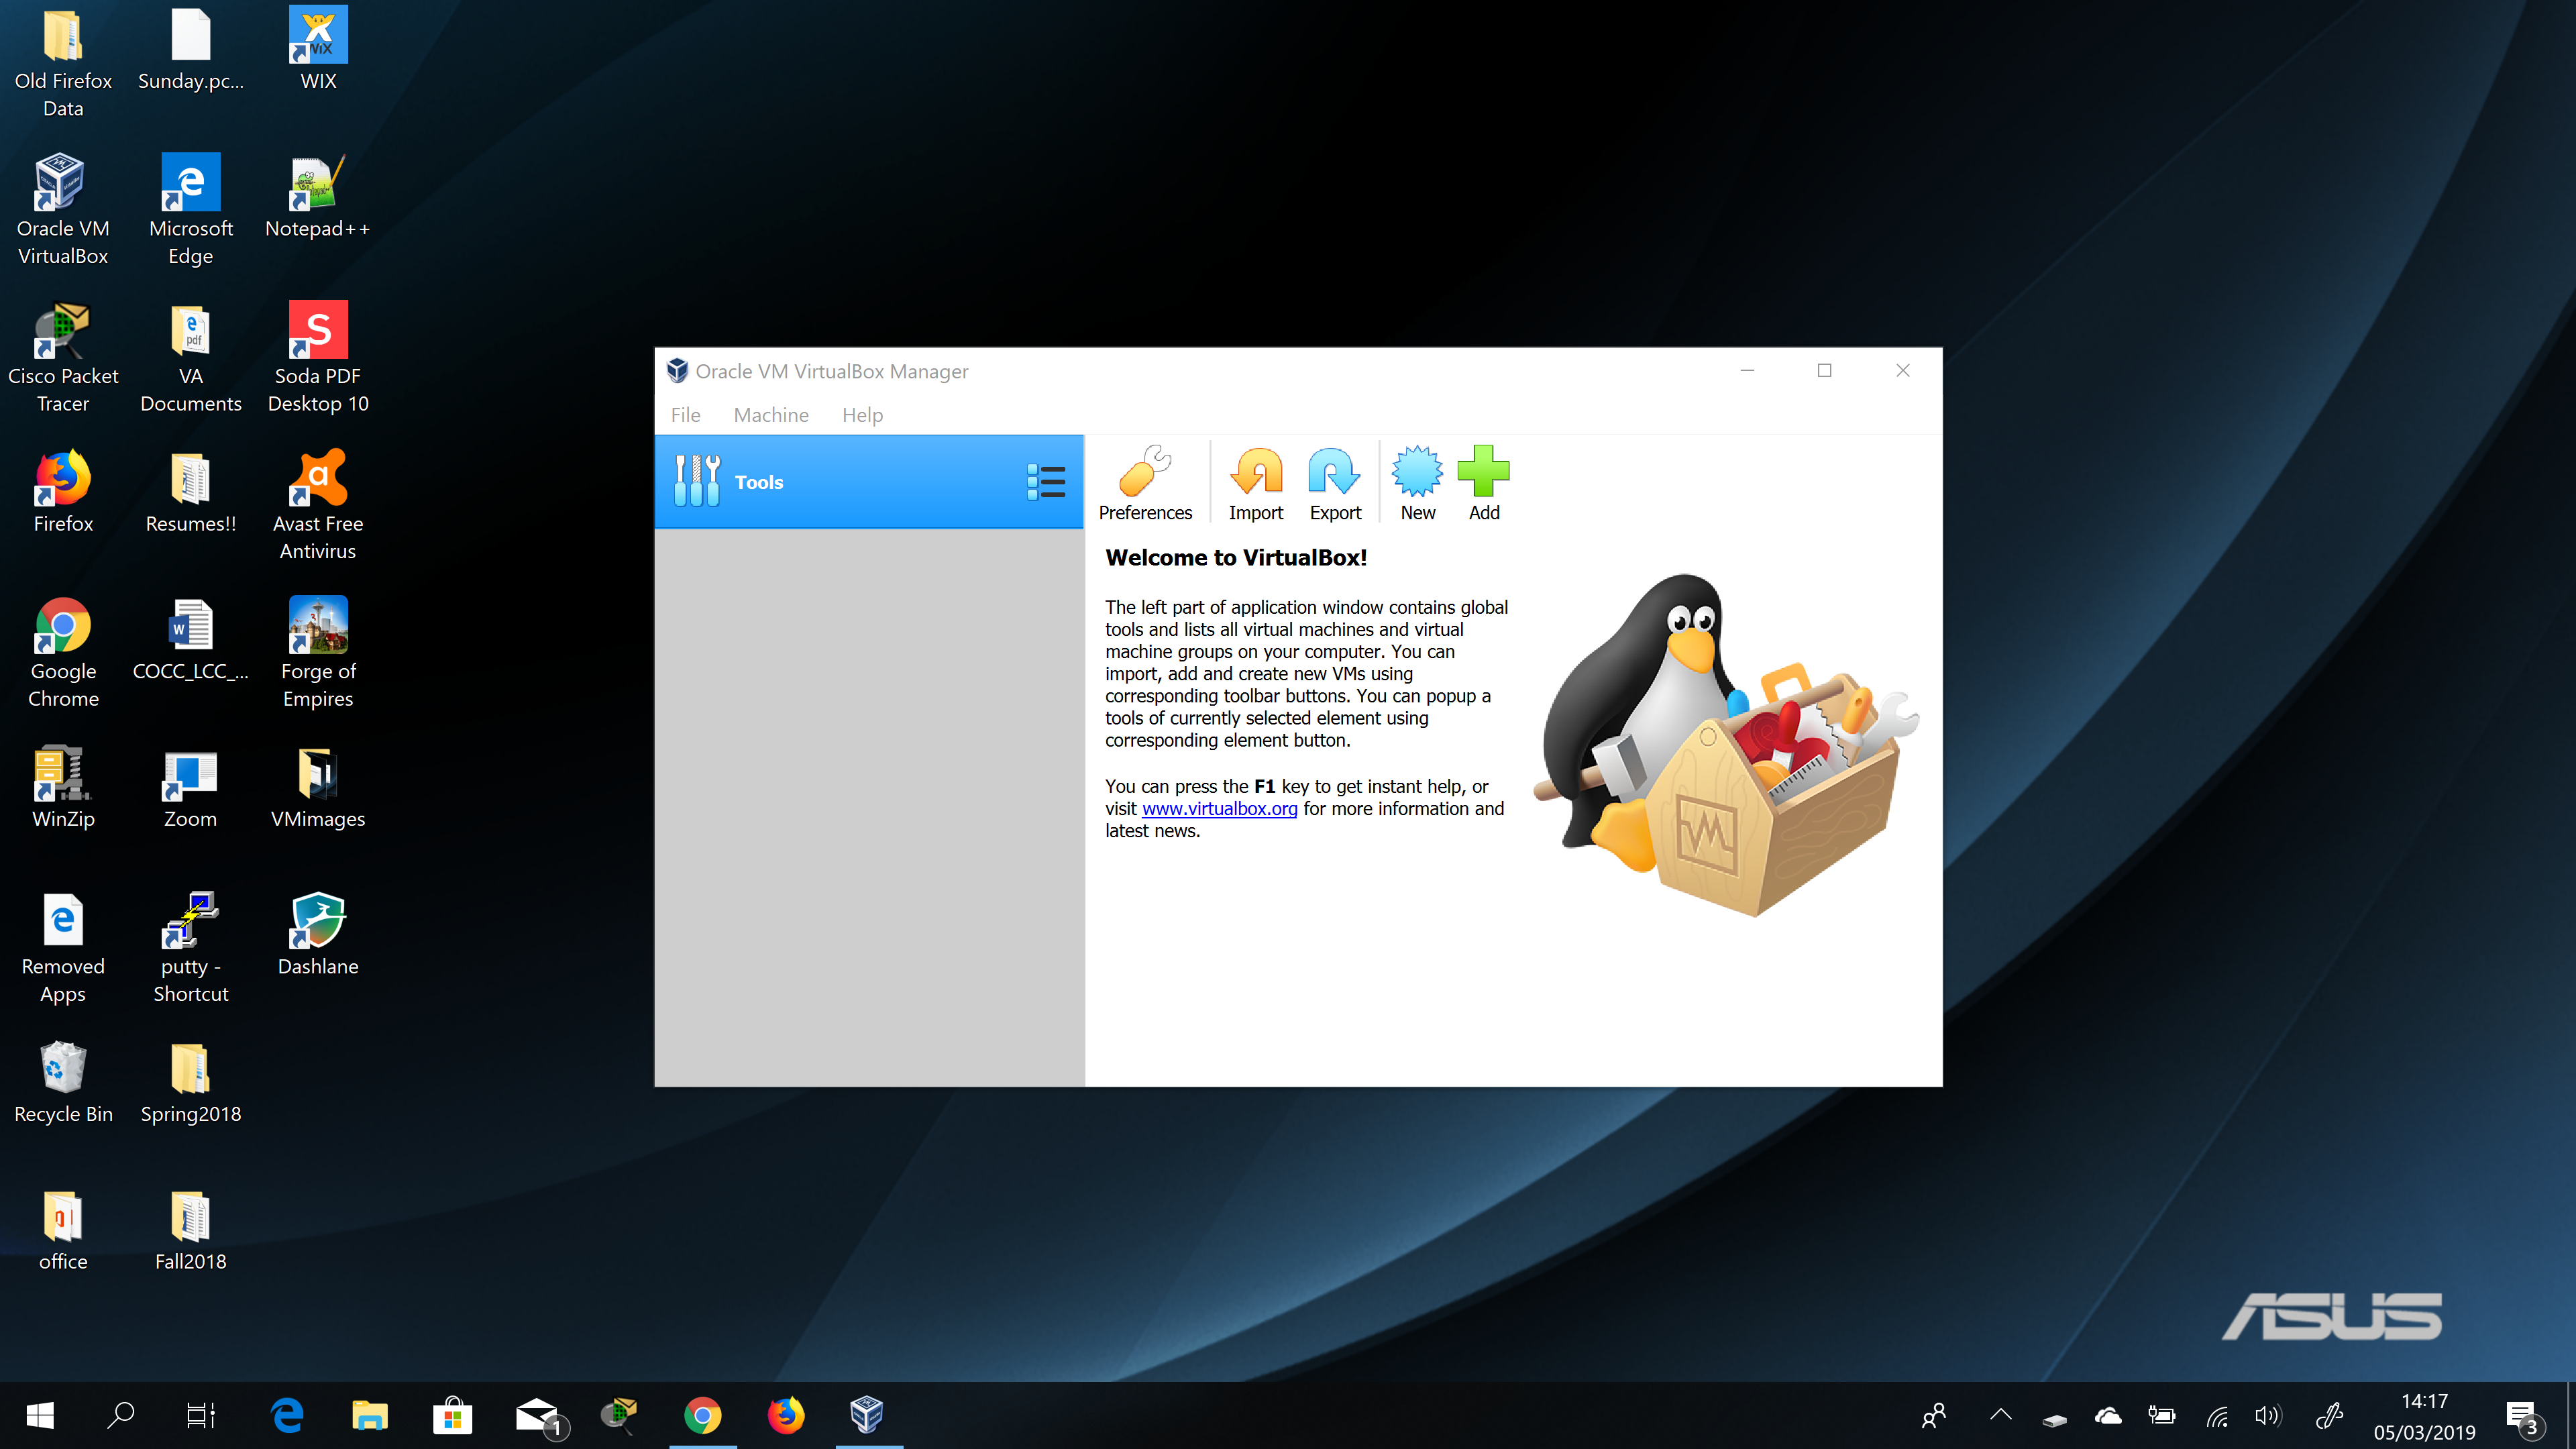
The “Oracle VM VirtualBox Manager” window should automatically open once the installation is complete. If not double click on the desktop shortcut/icon for the “Oracle VM VirtualBox” or alternatively perform a search for the program on your machine and open and run the program. The window should look something similar to the image below. The window will display a “Welcome” message since it is a new installation you will not have any virtual machines created. On this screen click the “New” icon on the top right pane of the window that looks similar to a seal. The left pane of the window will list any virtual machines you have created, but since this is a new installation there should be none.
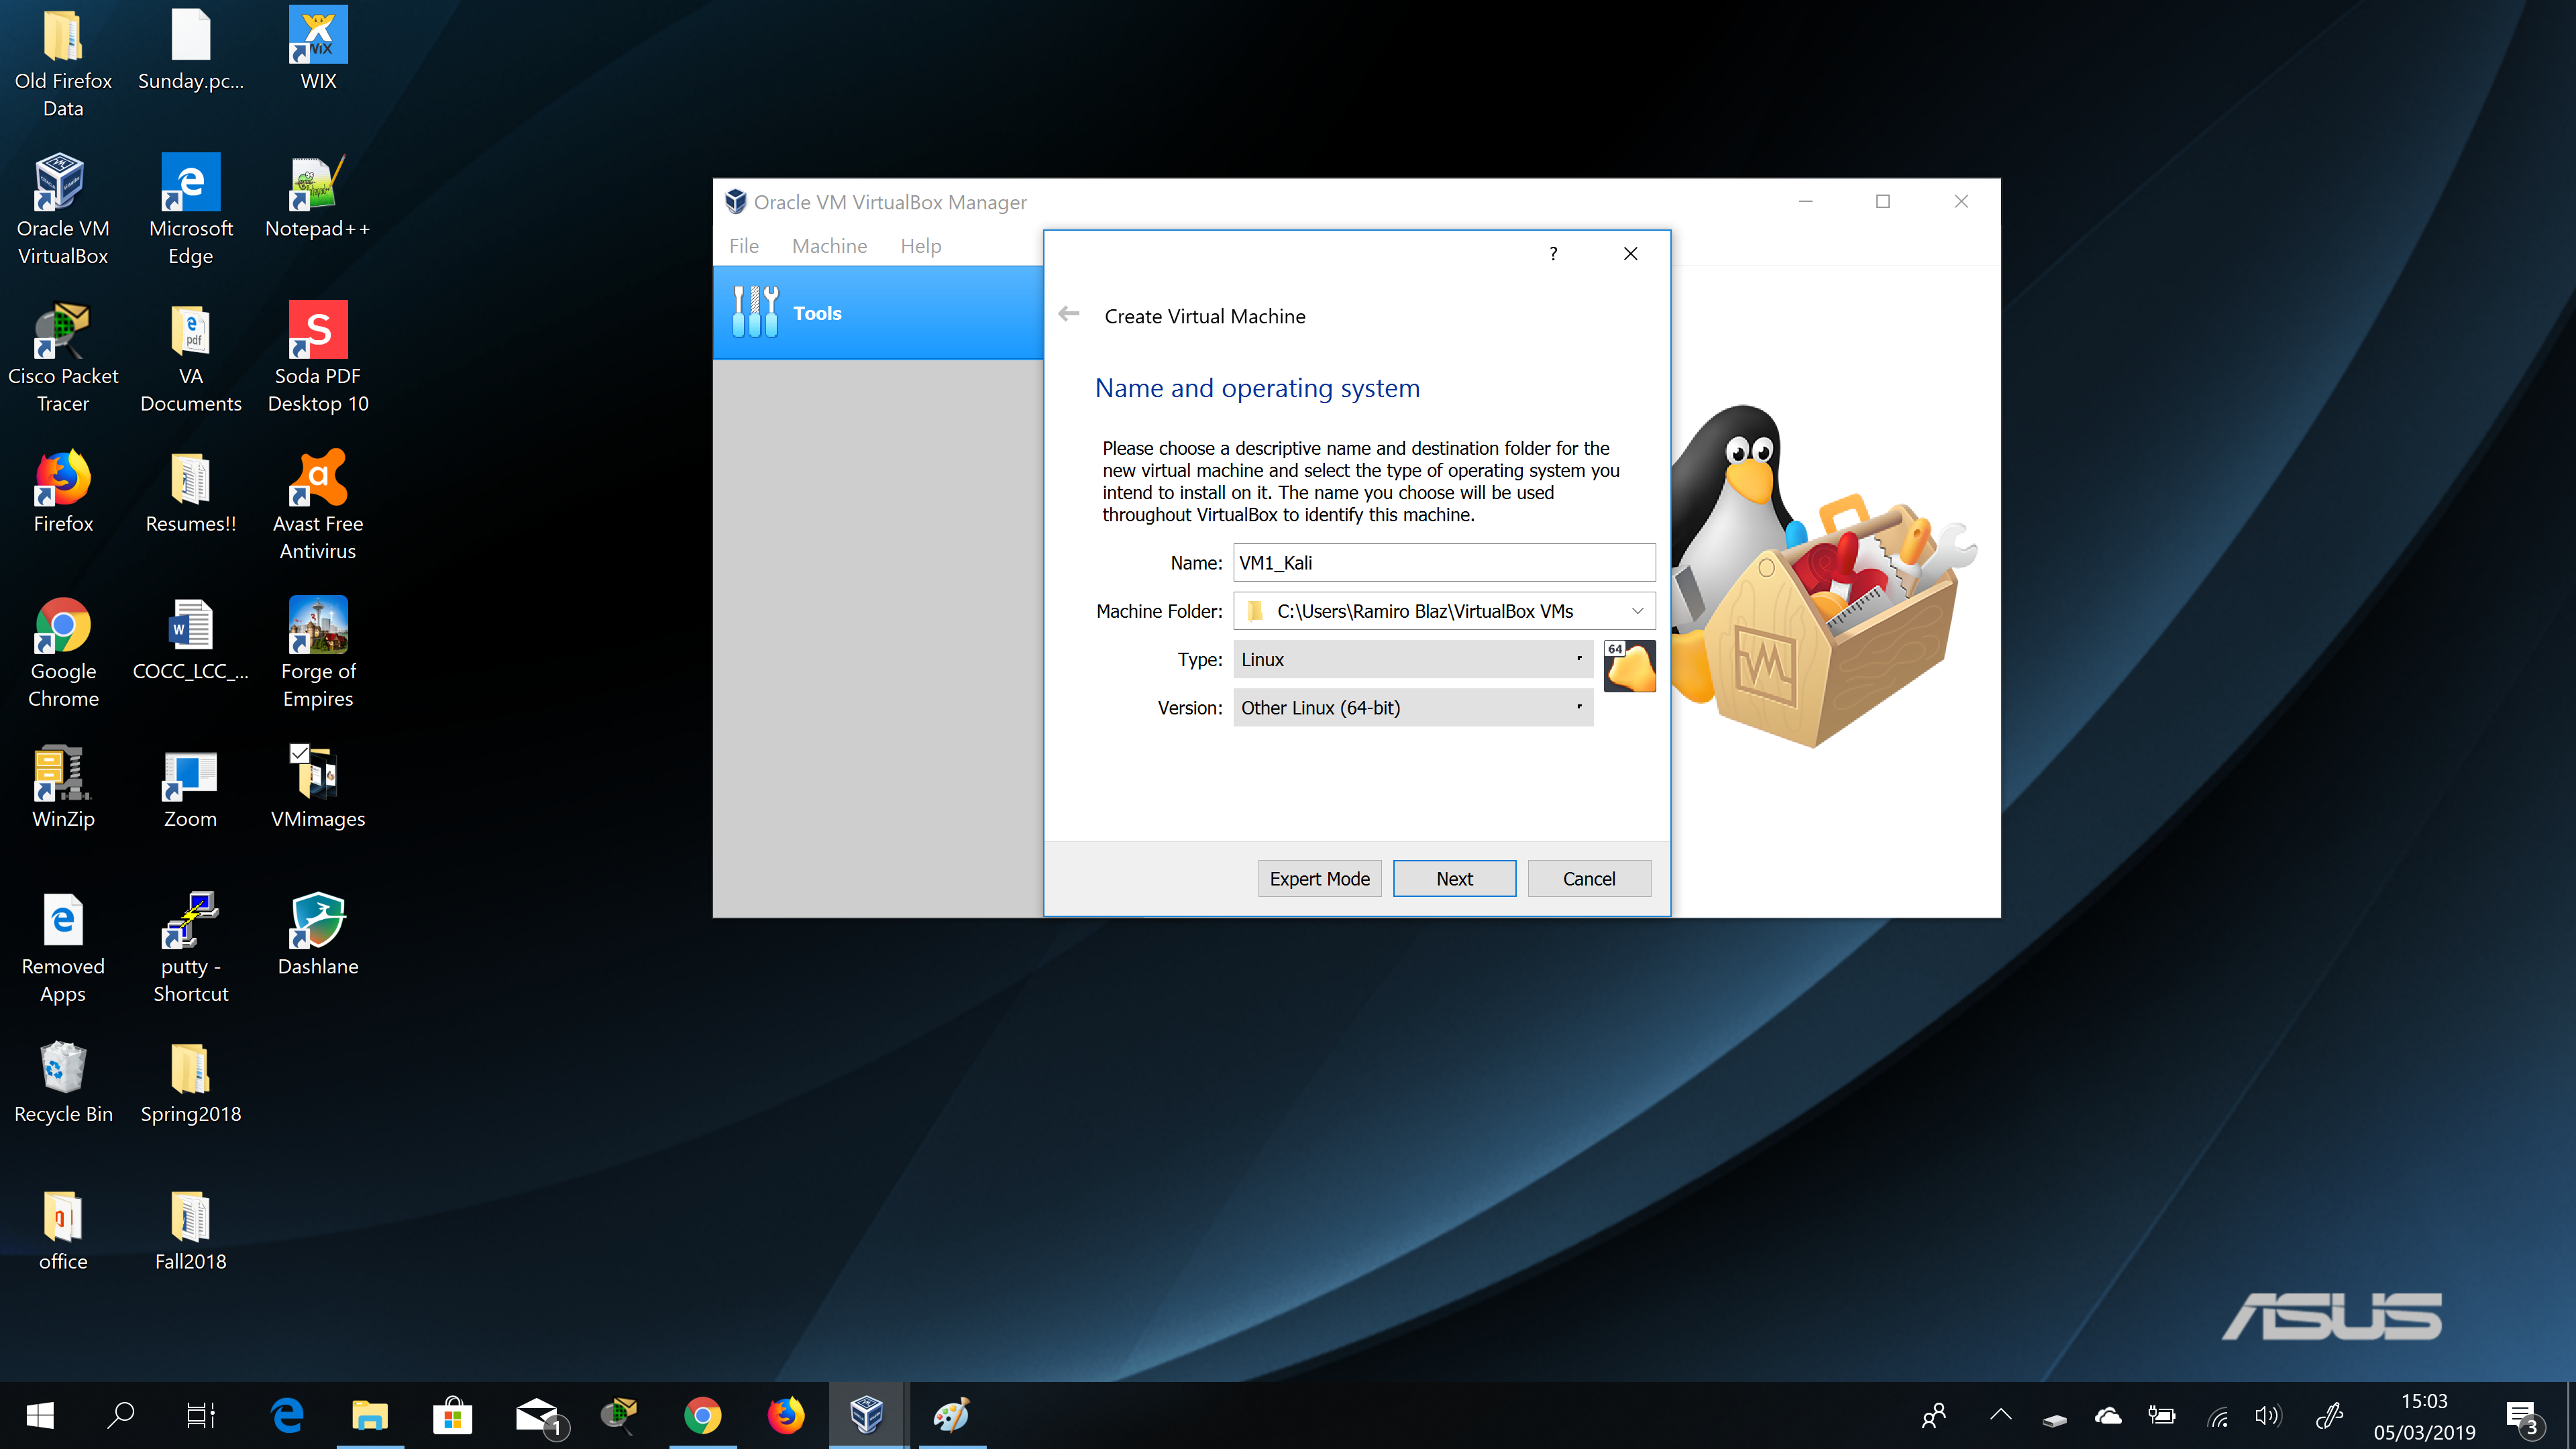
The next screen will display a “Create Virtual Machine” window follow the instructions to choose a name, folder in which to store the VM, and type of Operating System you will be installing on the virtual machine then click next to continue to the memory allocations window. This screen should look something like the image below.
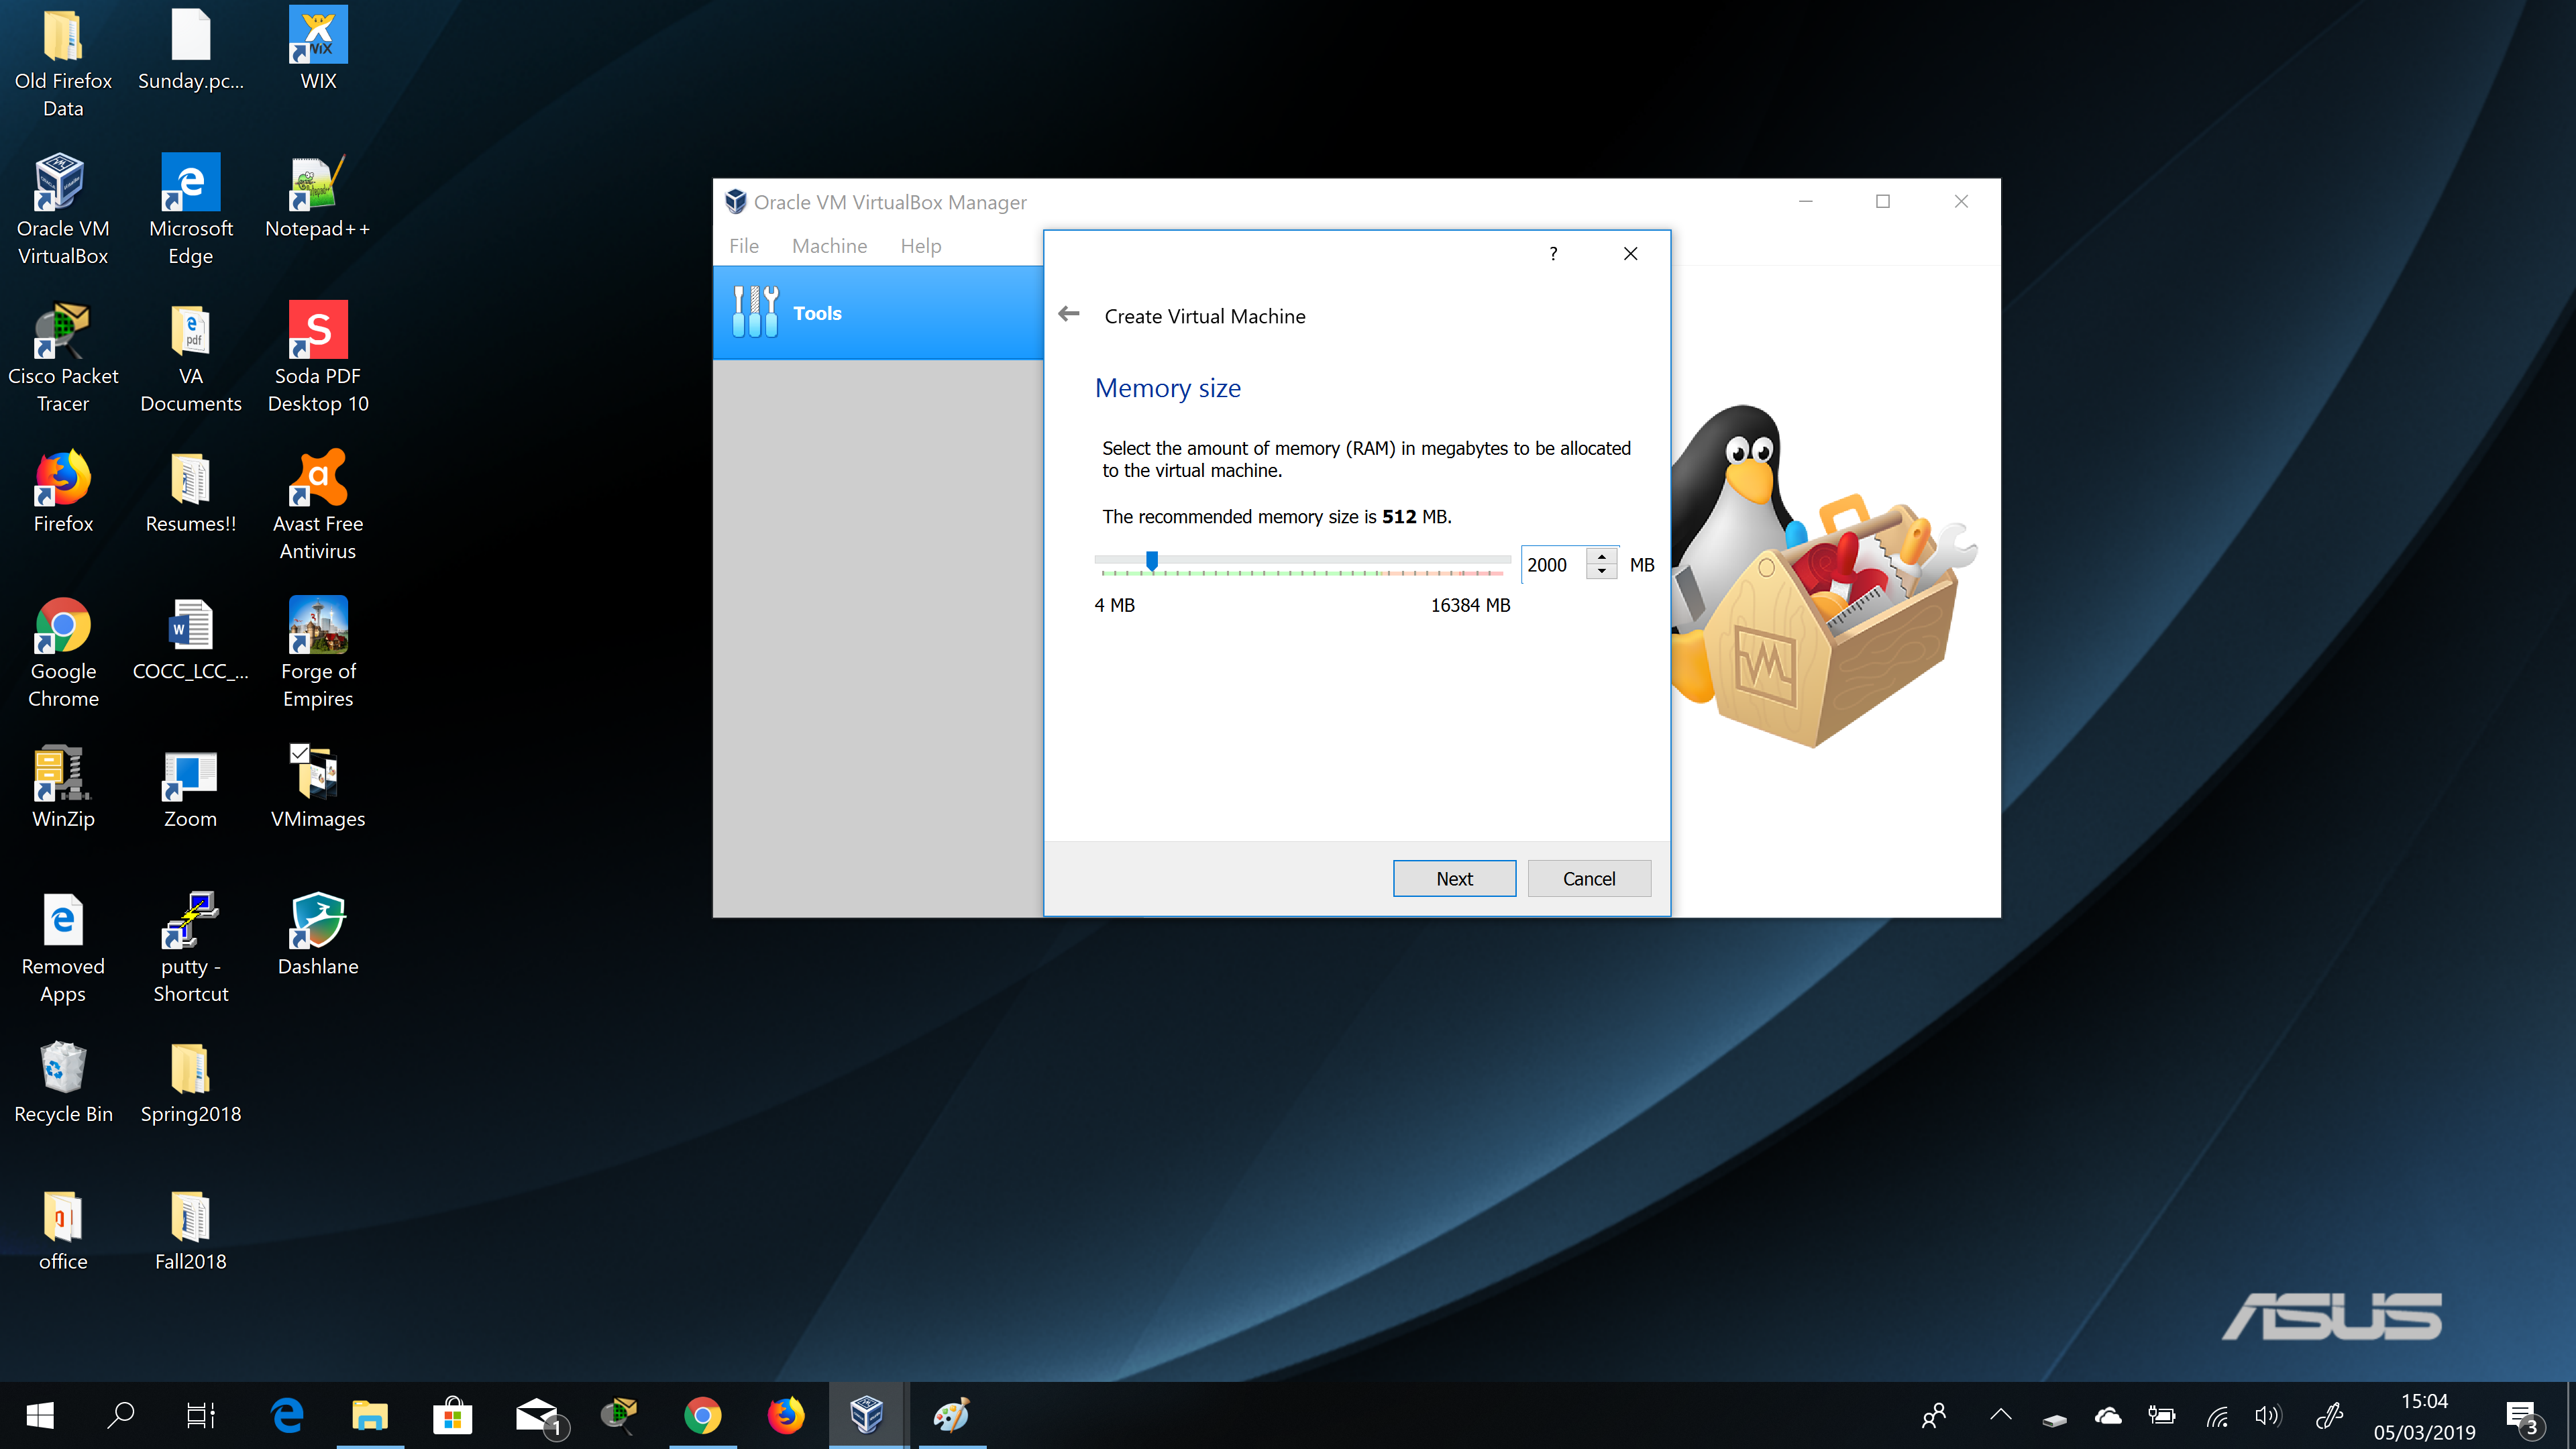
You now are at the window to allocate memory for you virtual machine. At this step allocate 2GB (2000MB) of memory to your virtual machine. It is important to note that Linux Centos7 really only needs 1GB of memory for a basic installation without a GUI(Graphical User Interface). If you are installing a Windows OS you will need a minimum of 4GB(4000MB) of memory. After you have completed memory allocation click the next button to continue to your Hard disk configuration screen. Again the window at this step should look similar to the image below.
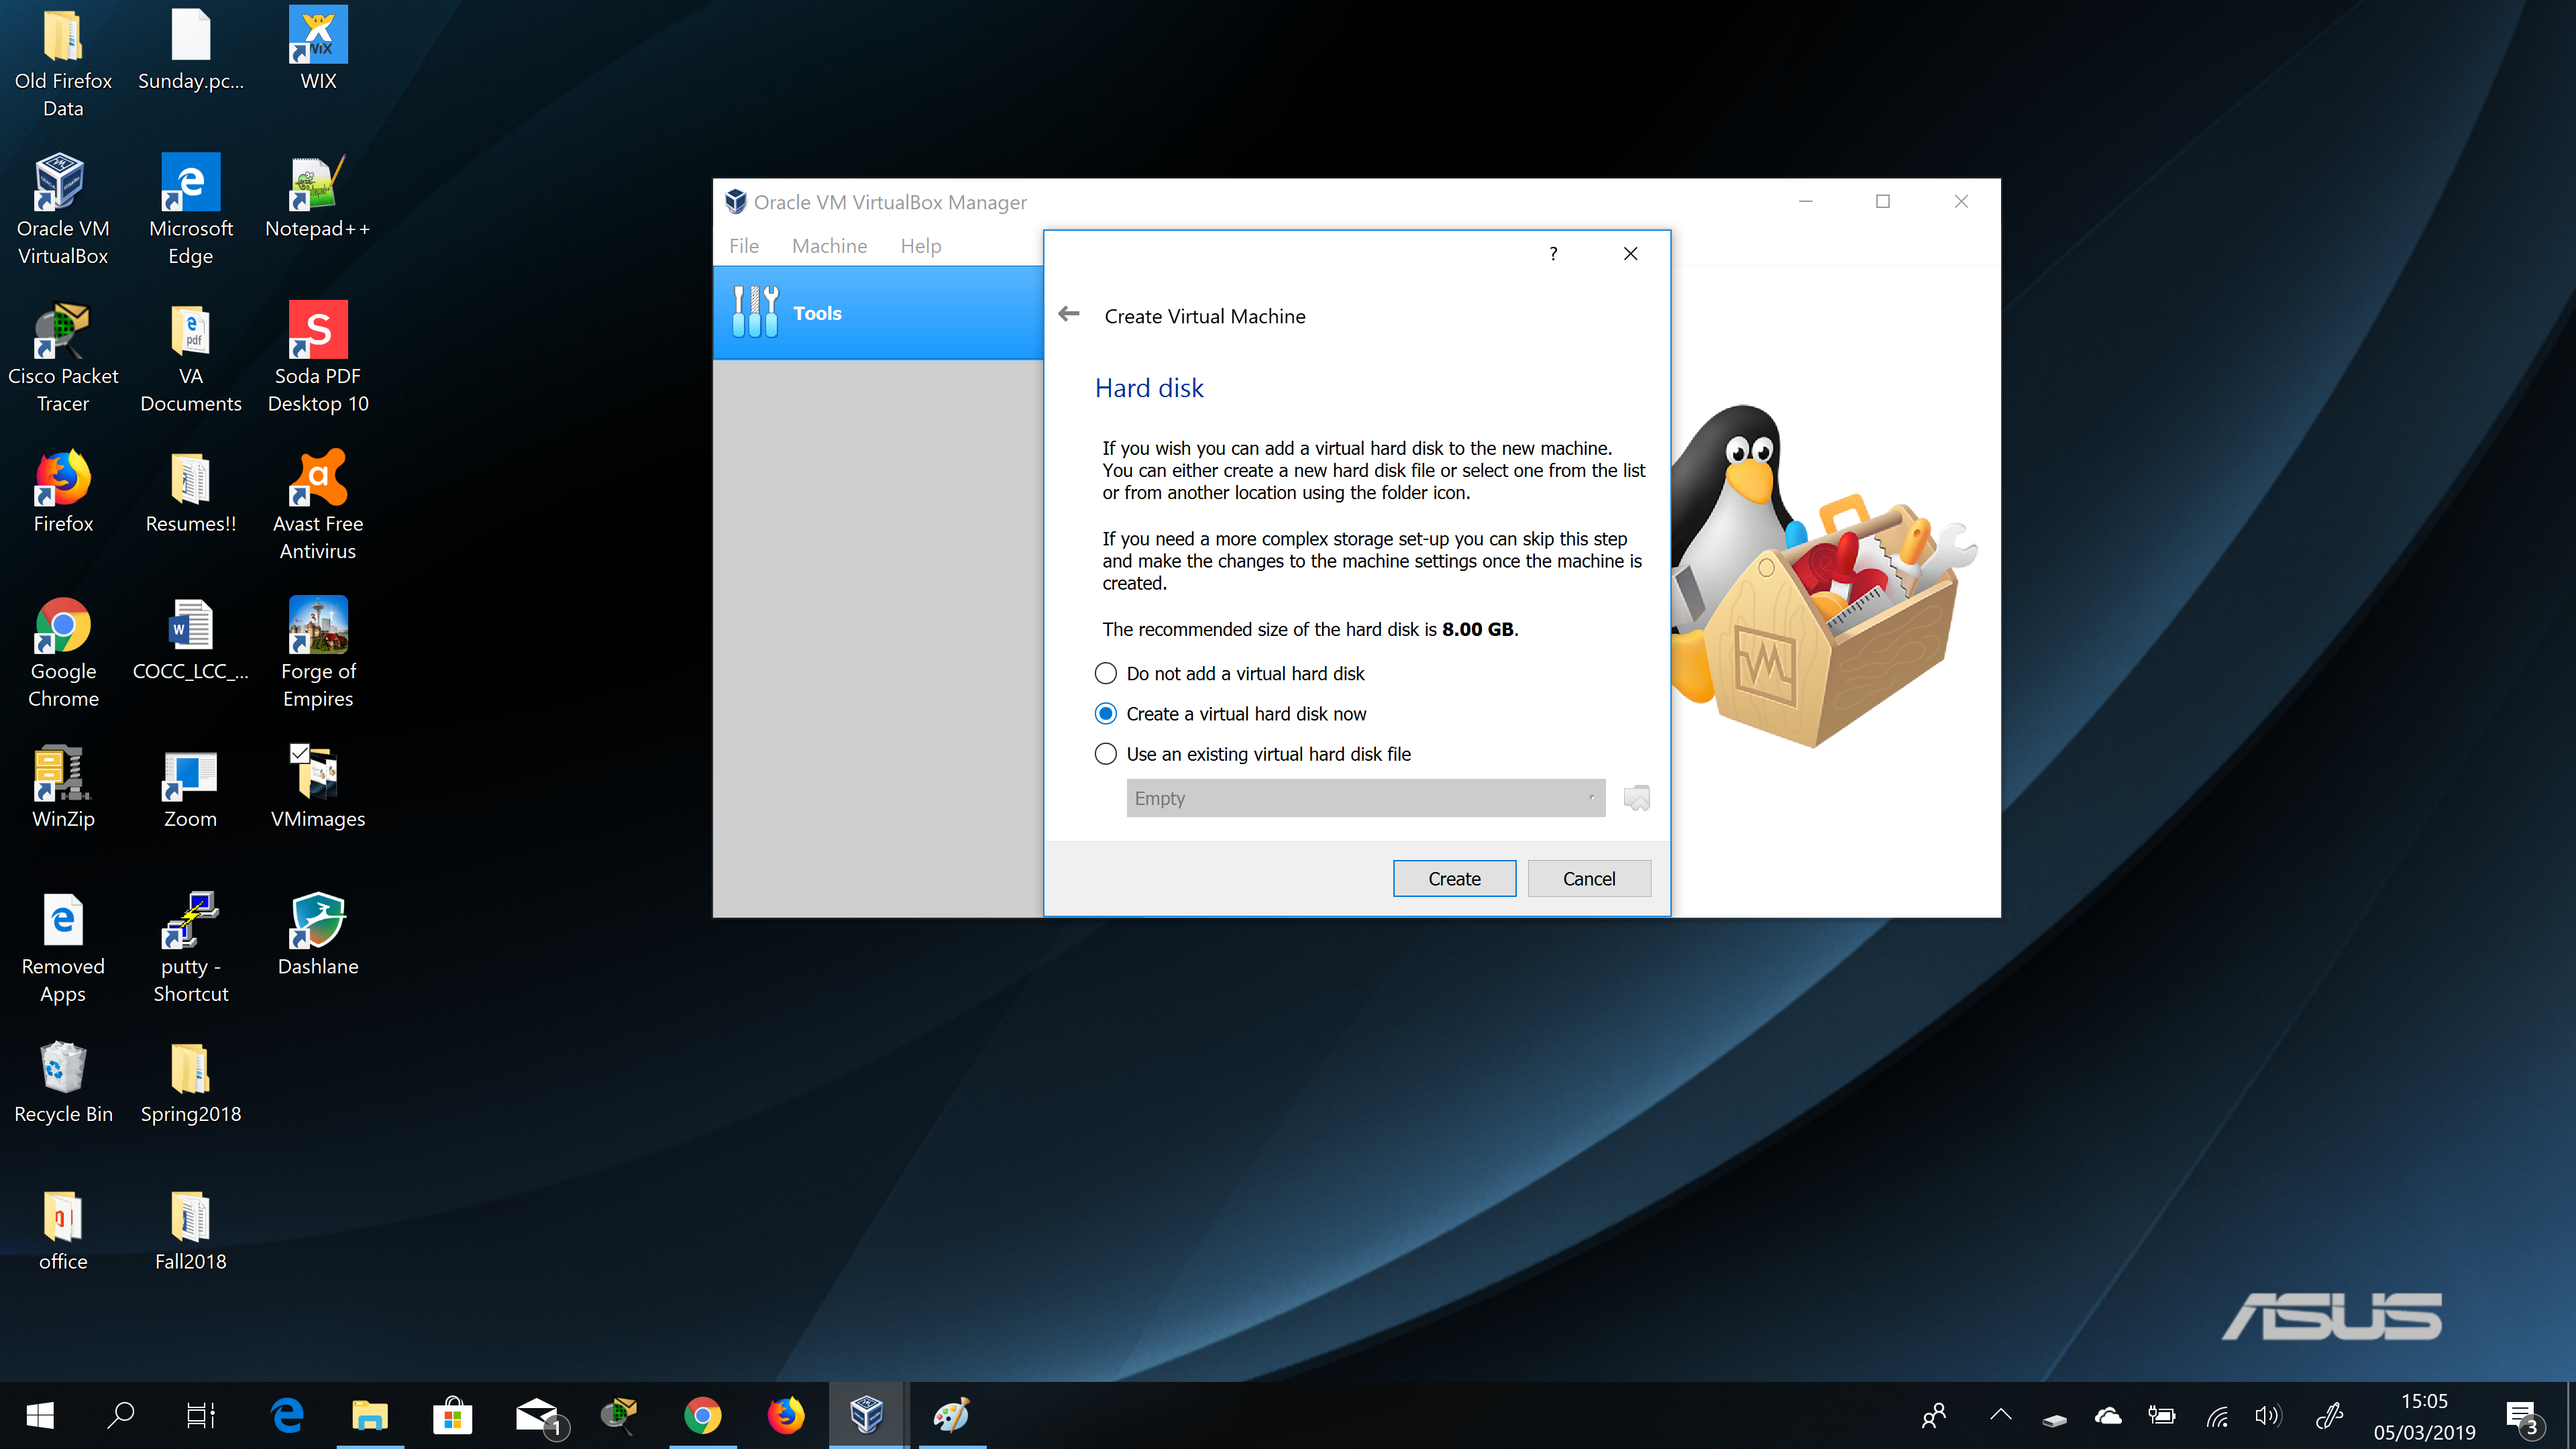
This next window is the Hard disk window and a selection should already be selected. This window should look like the image below. The “Create a virtual hard disk now” should be selected so click the “Create” button and continue to the next window, the “Hard disk file type” window.
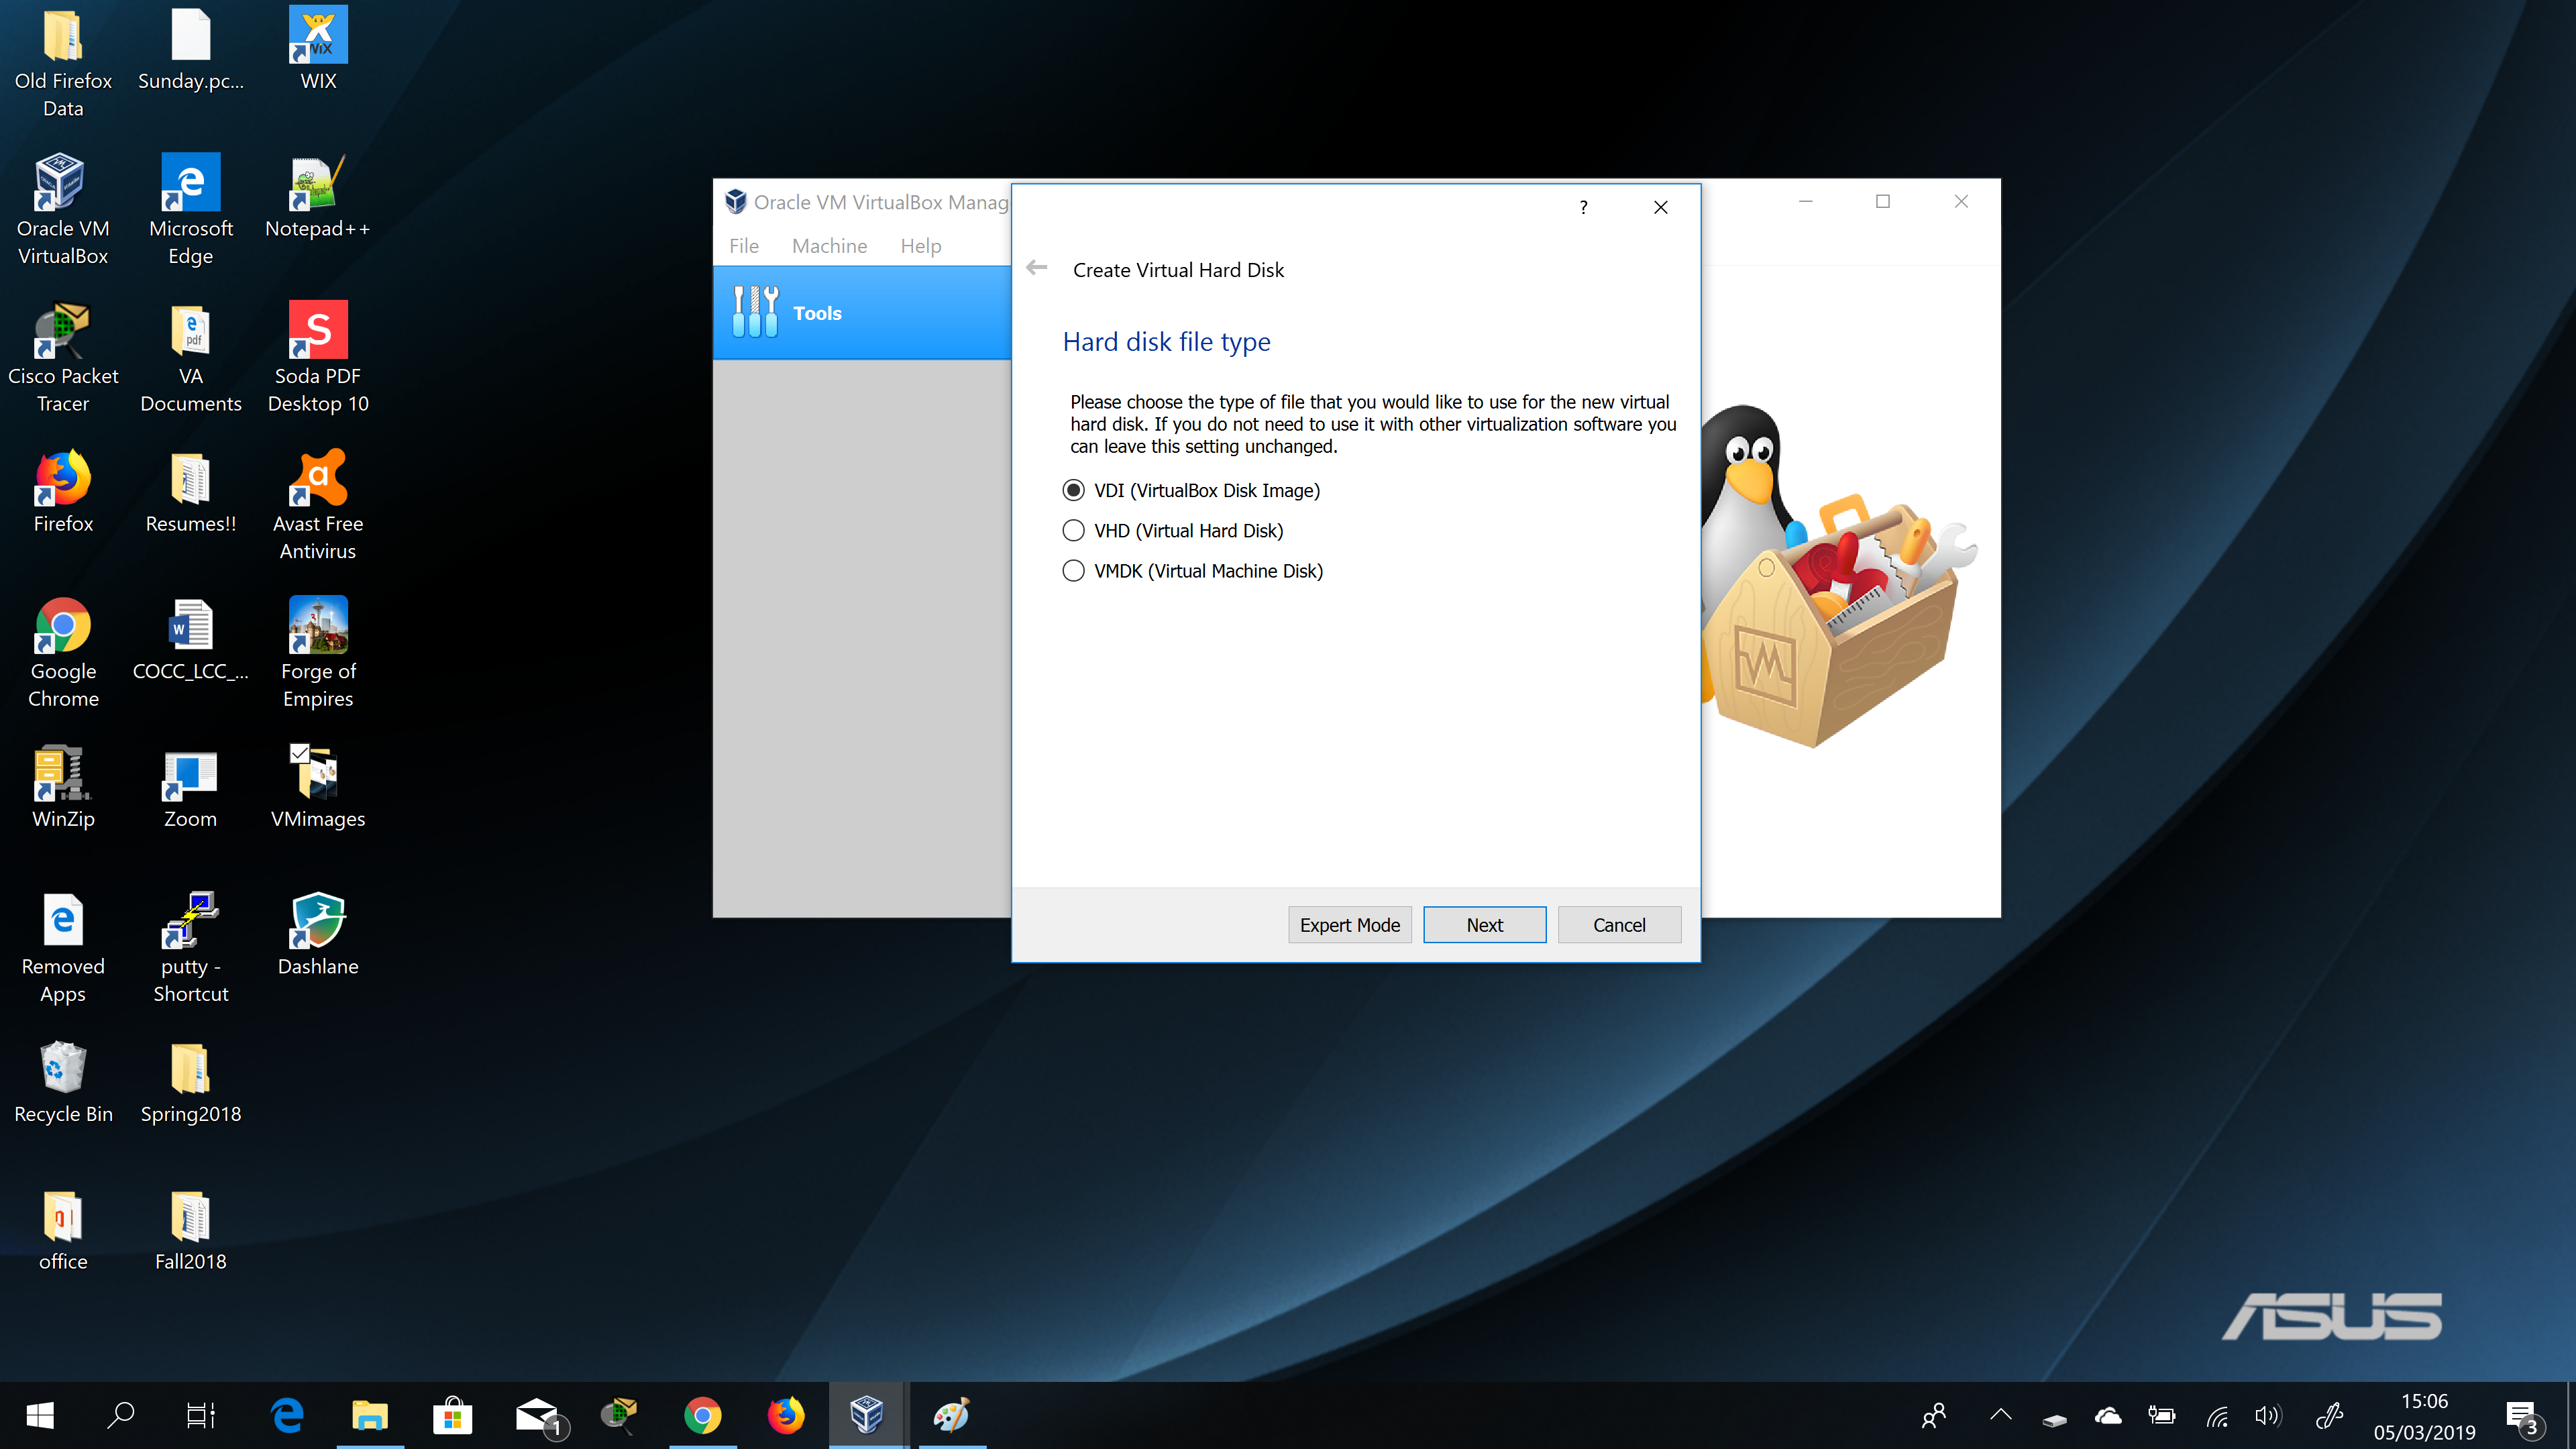
You are now at the “Hard disk file type” window as shown below. Unless you are using the virtual hard disk file with other virtualization software there is no need to change the selection here and should remain at the VDI(Virtual Disk Image) selection. Click the Next button to move to the “Storage on physical hard disk” window.
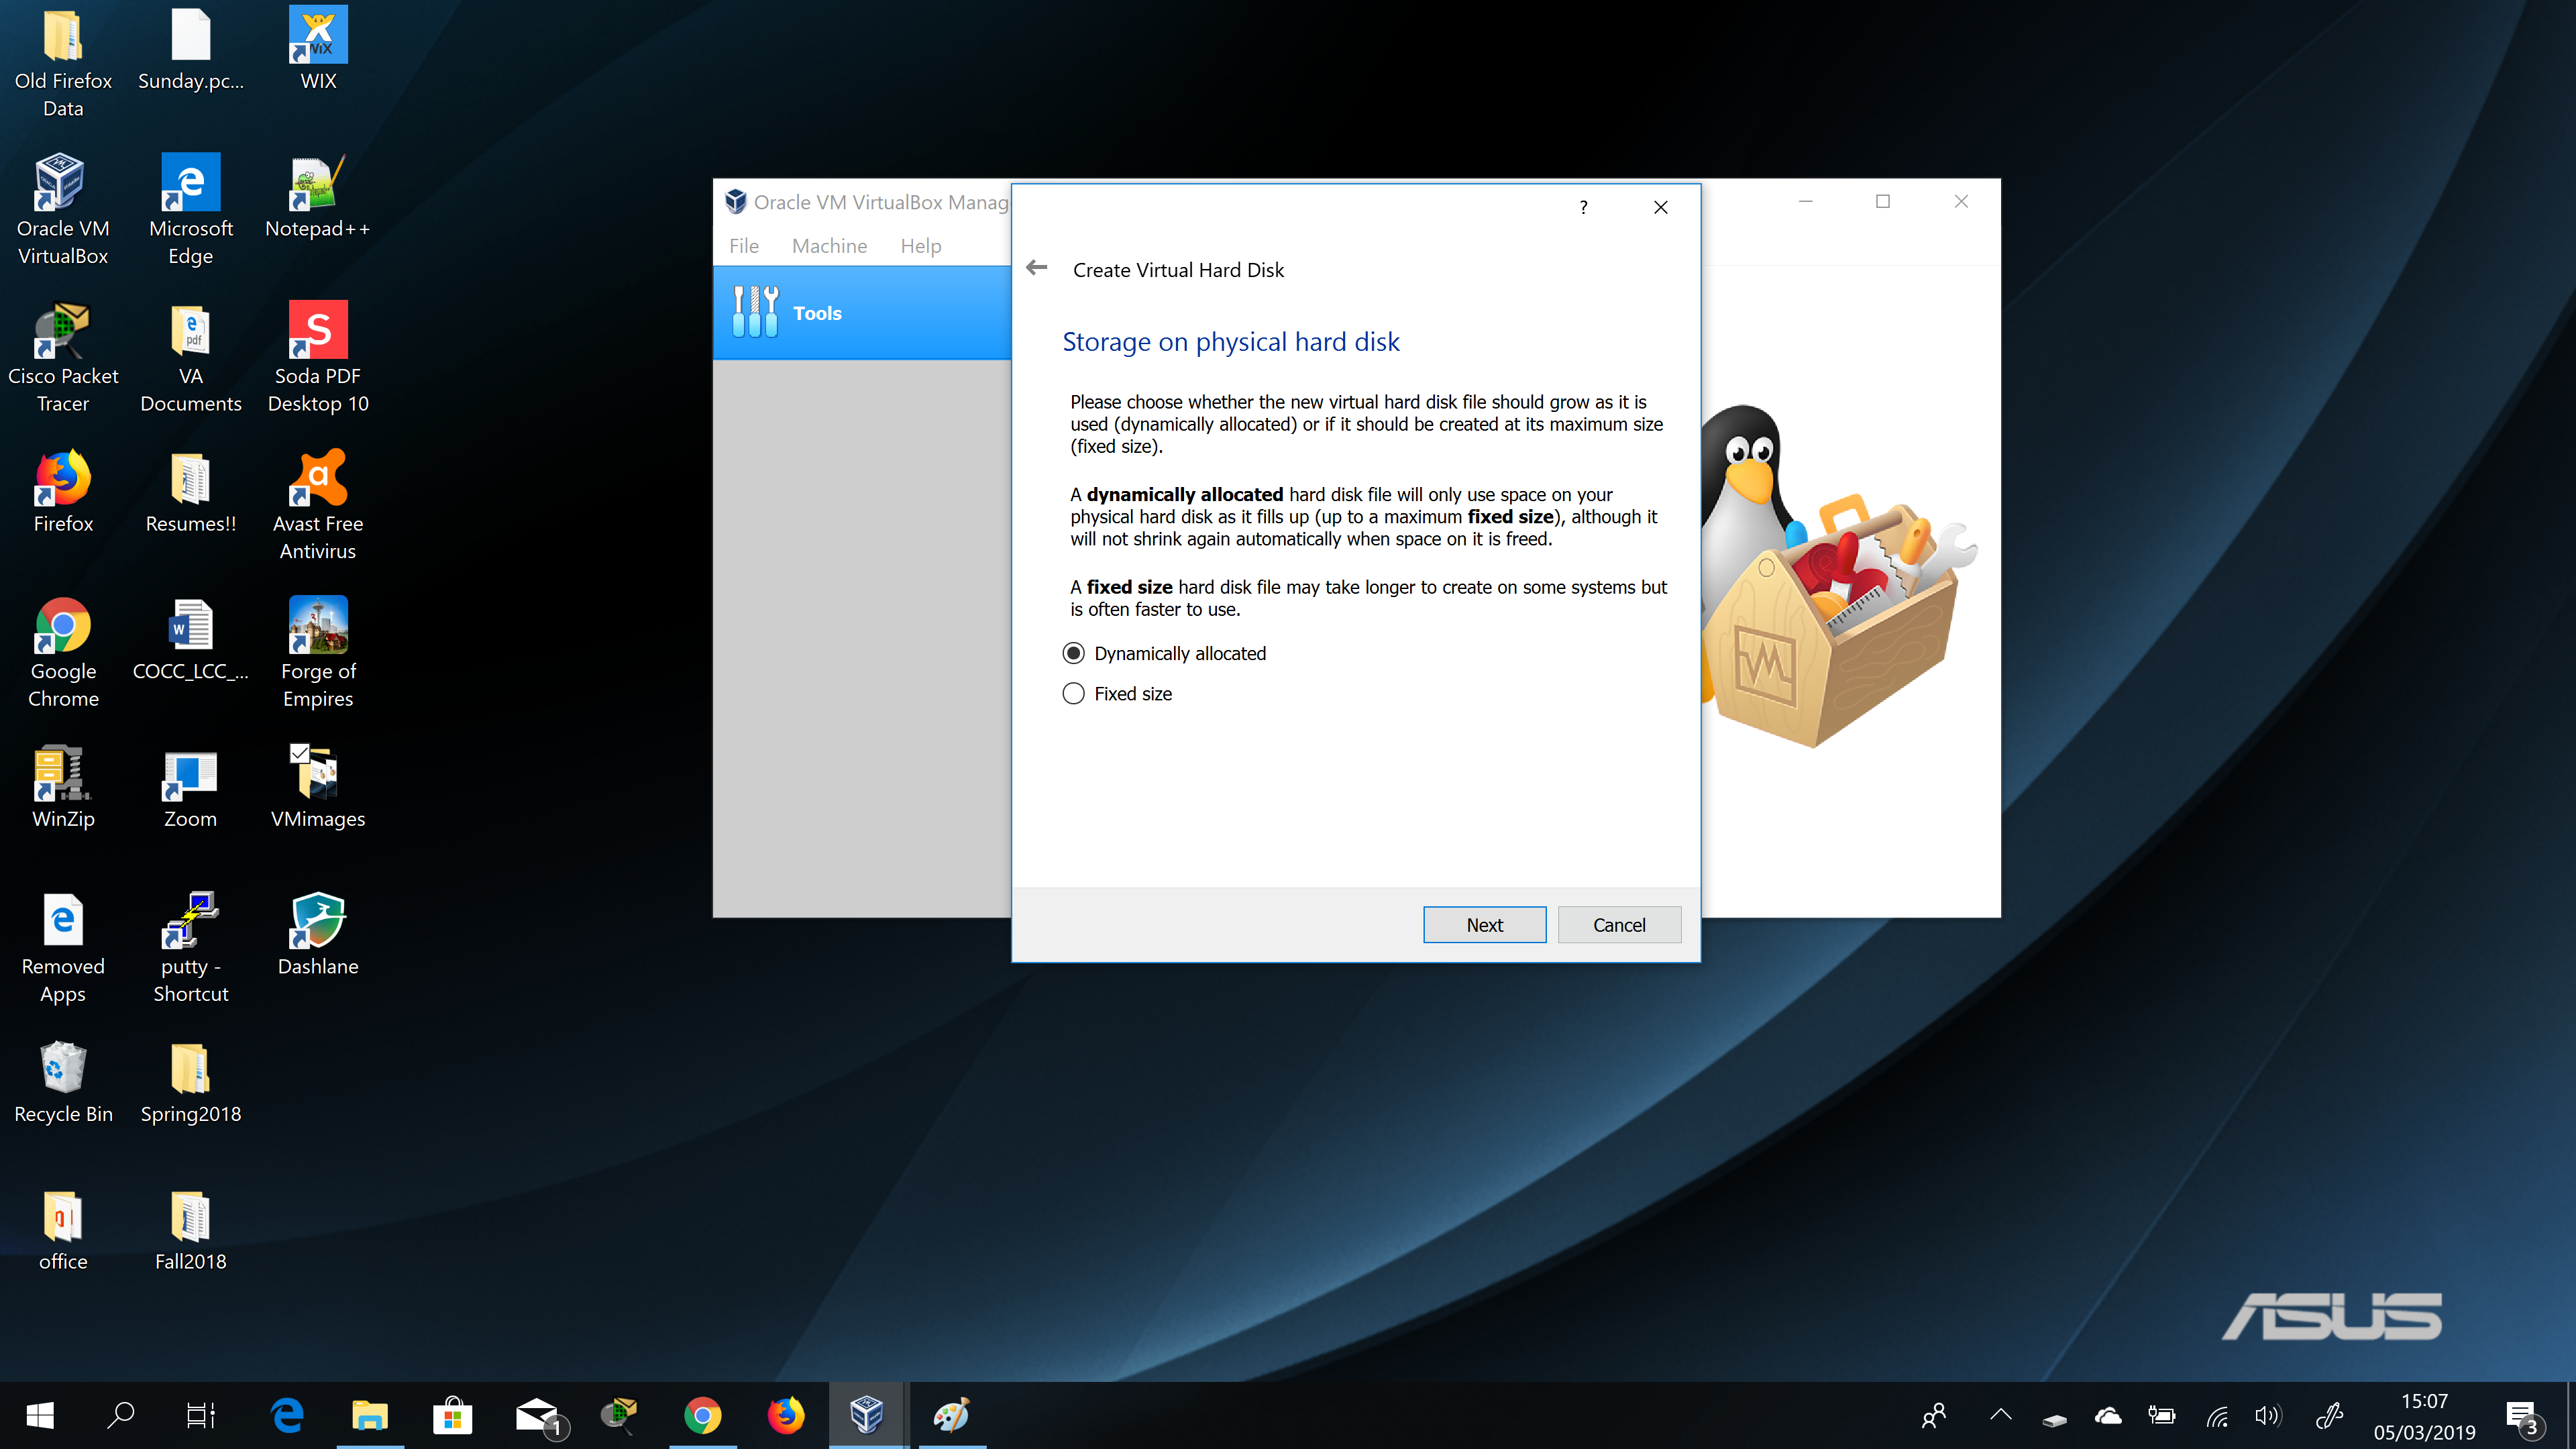
Here at the “Storage on physical hard disk” window as shown below you will choose either Dynamically allocated or Fixed size for storage of your virtual hard disk on your physical hard disk. For most of what is being done here on your assignment at LCC you should select the Dynamically allocated selection unless the 20GB of storage we will be allocating to the virtual hard drive for some reason needs to be fixed. Click the next button to continue to the “File location and size” window.
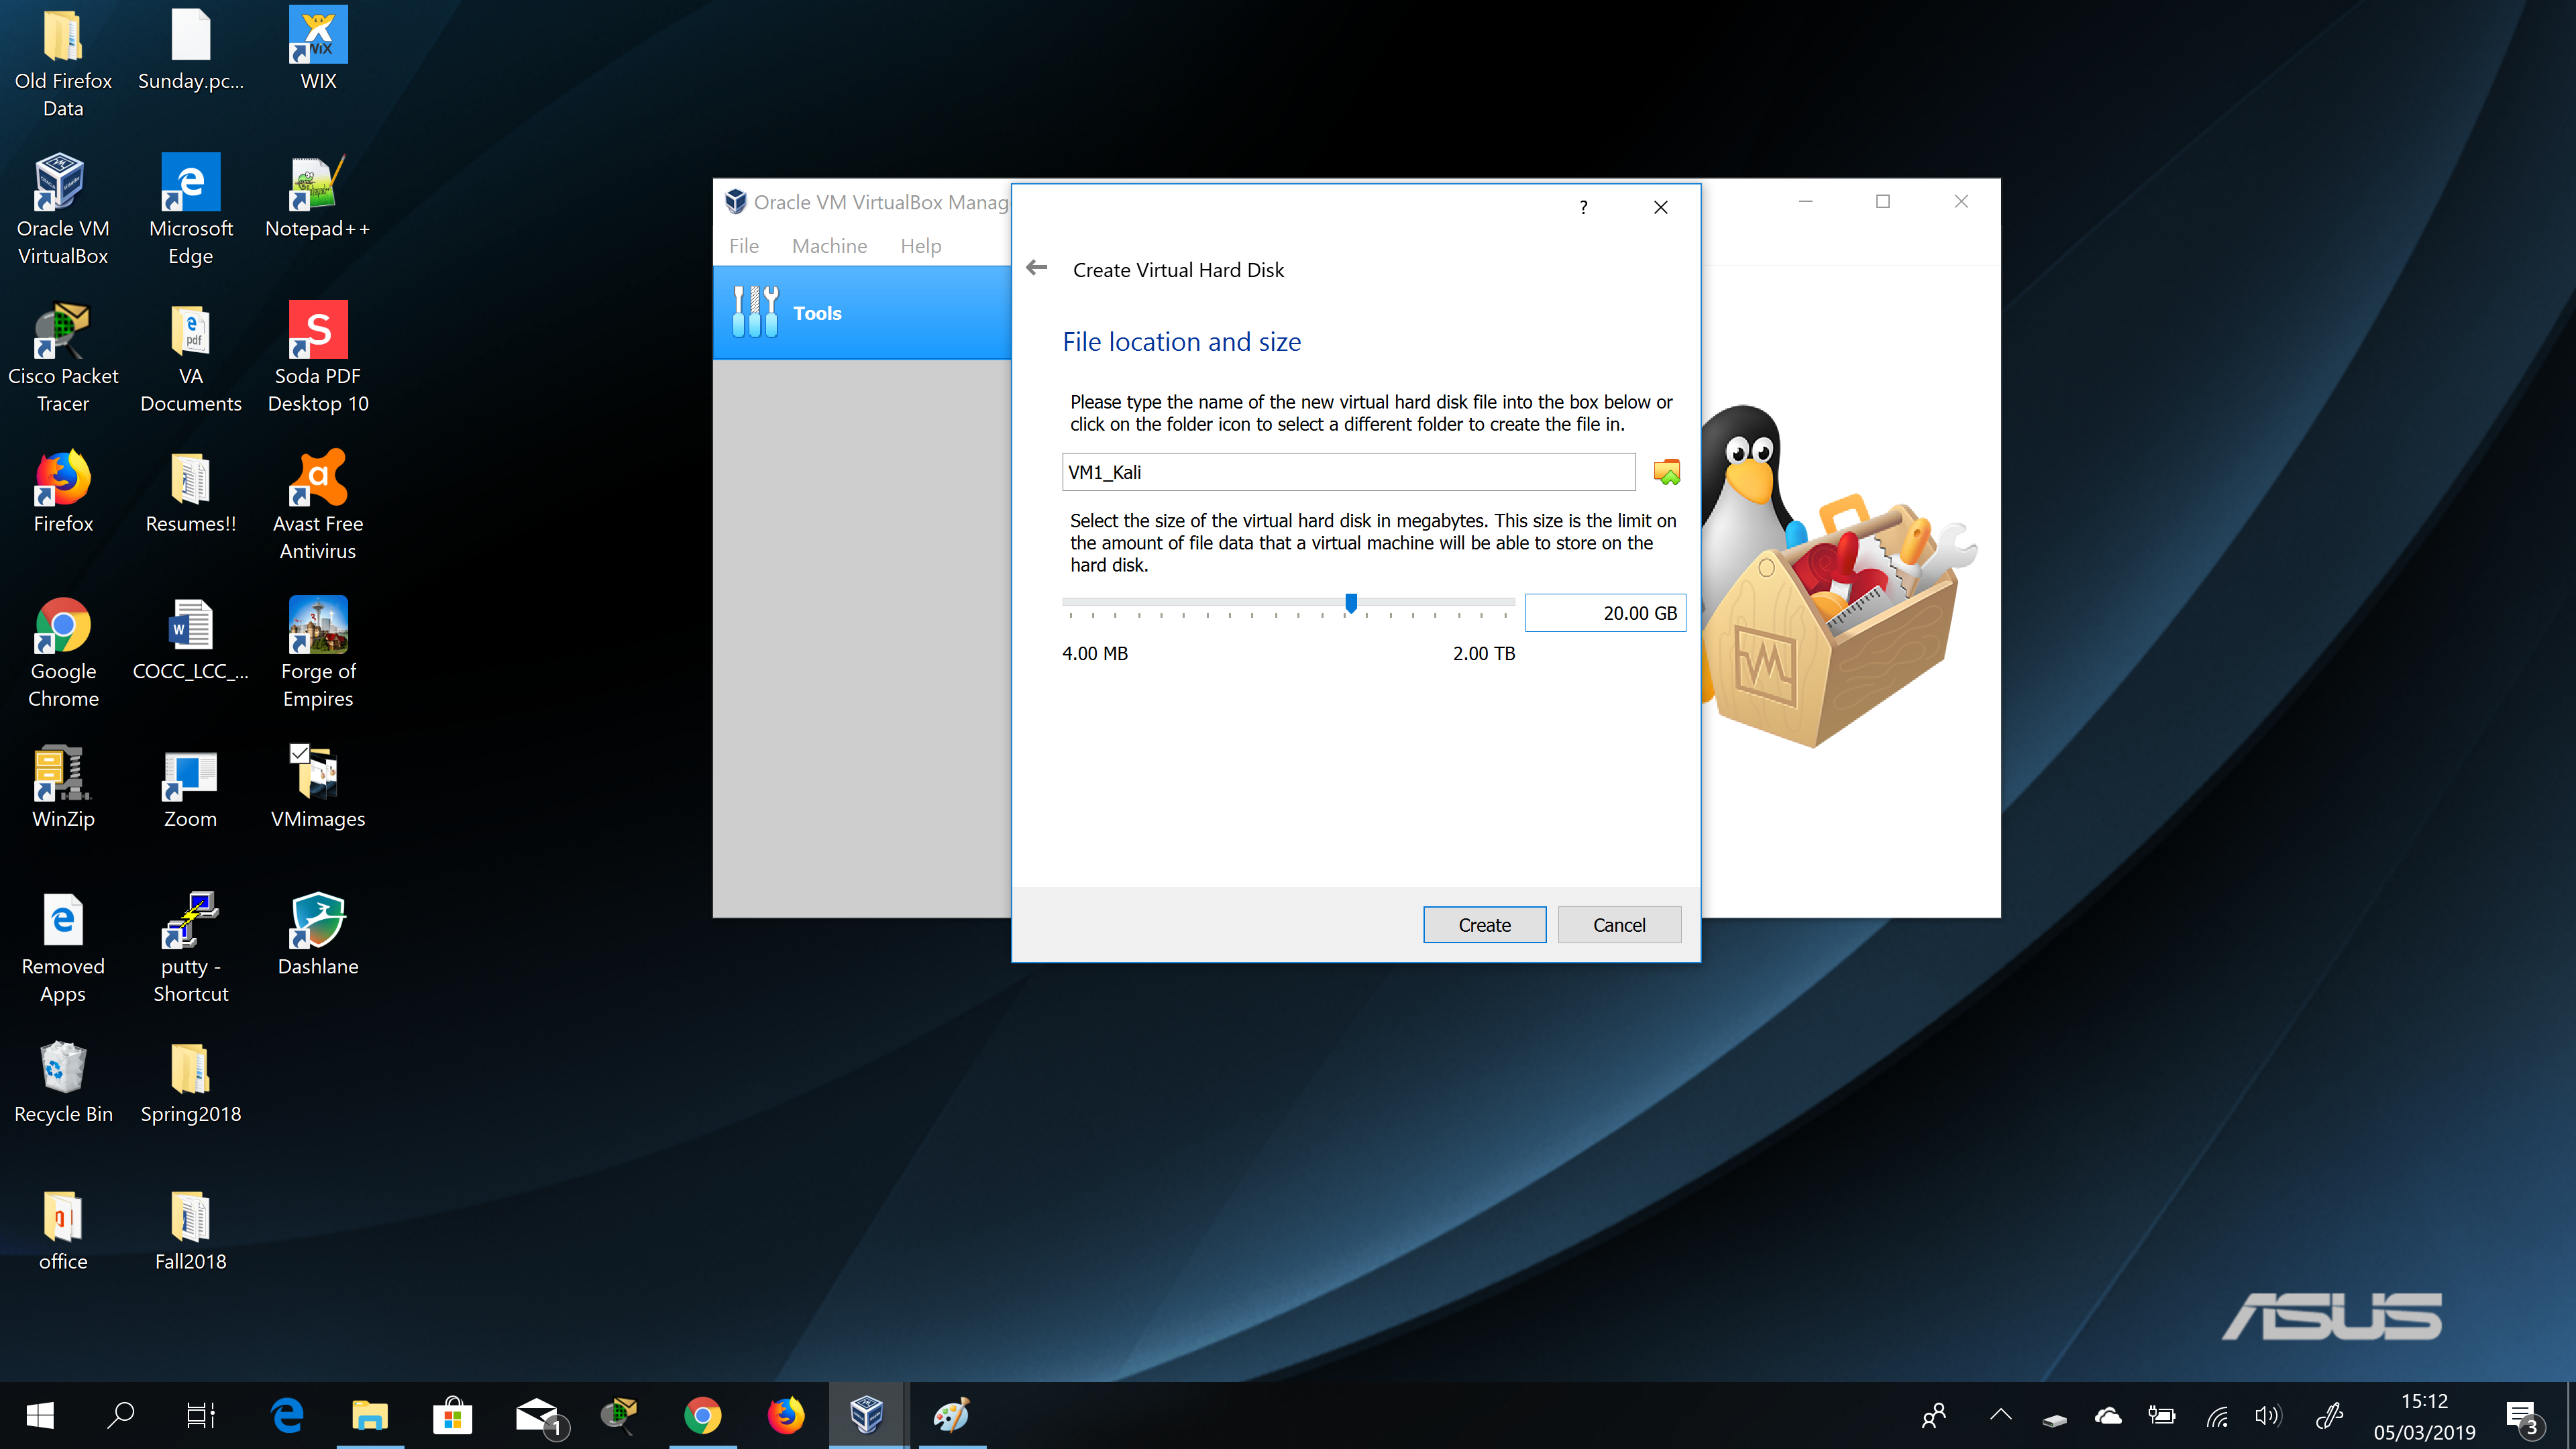
The “File location and size” window will look similar to the image below and this is where you name and allocate the size of virtual hard disk file. The name should automatically populate and if you choose to name it something else you can do that here. You can use the slider or dialog box to enter a different value that you want to allocate to the virtual hard disk. For this installation use 20GB for the virtual hard disk then click the Create button. This the final step in creating your virtual machine.
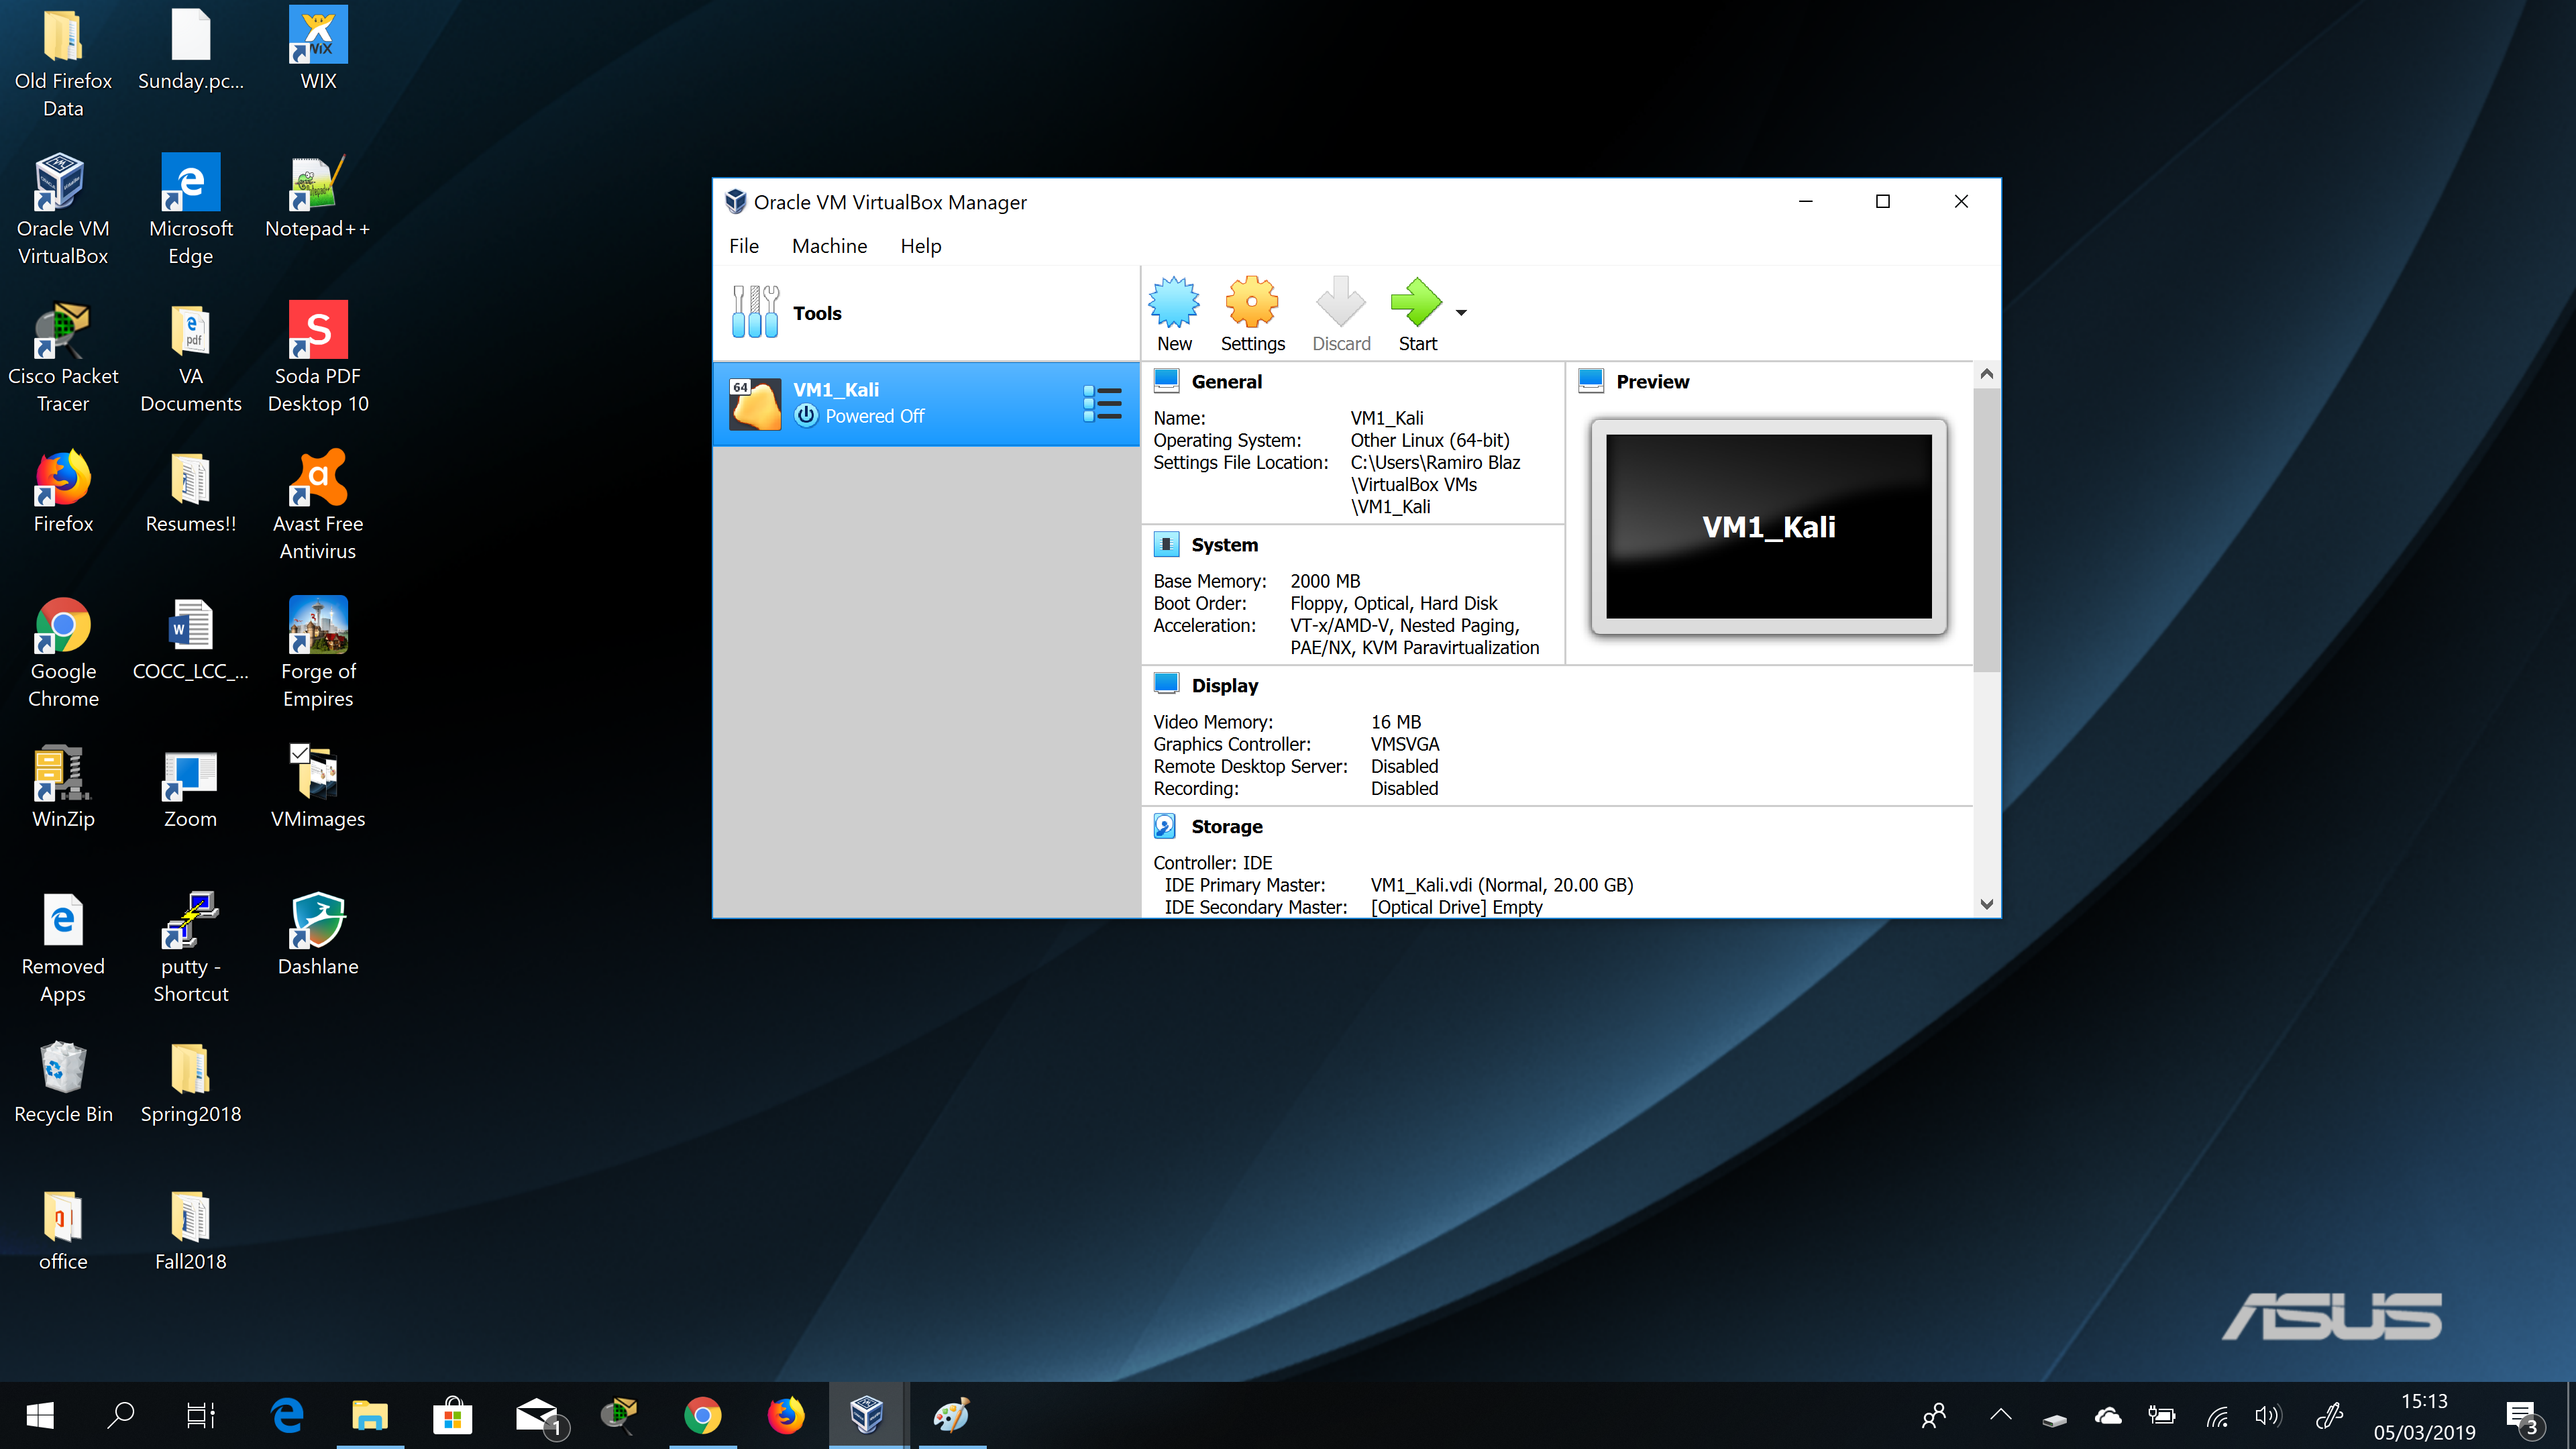
Once you have created your virtual machine the OracleVM VirtualBox Manager window should display the virtual machine you just created on the left pane of the window and the details of that machine on the right pane of the window and should look similar the image below. You have now successfully installed your virtual machine software and created and configured your virtual machine using that software! Congratulations!
Installing your linux operating system
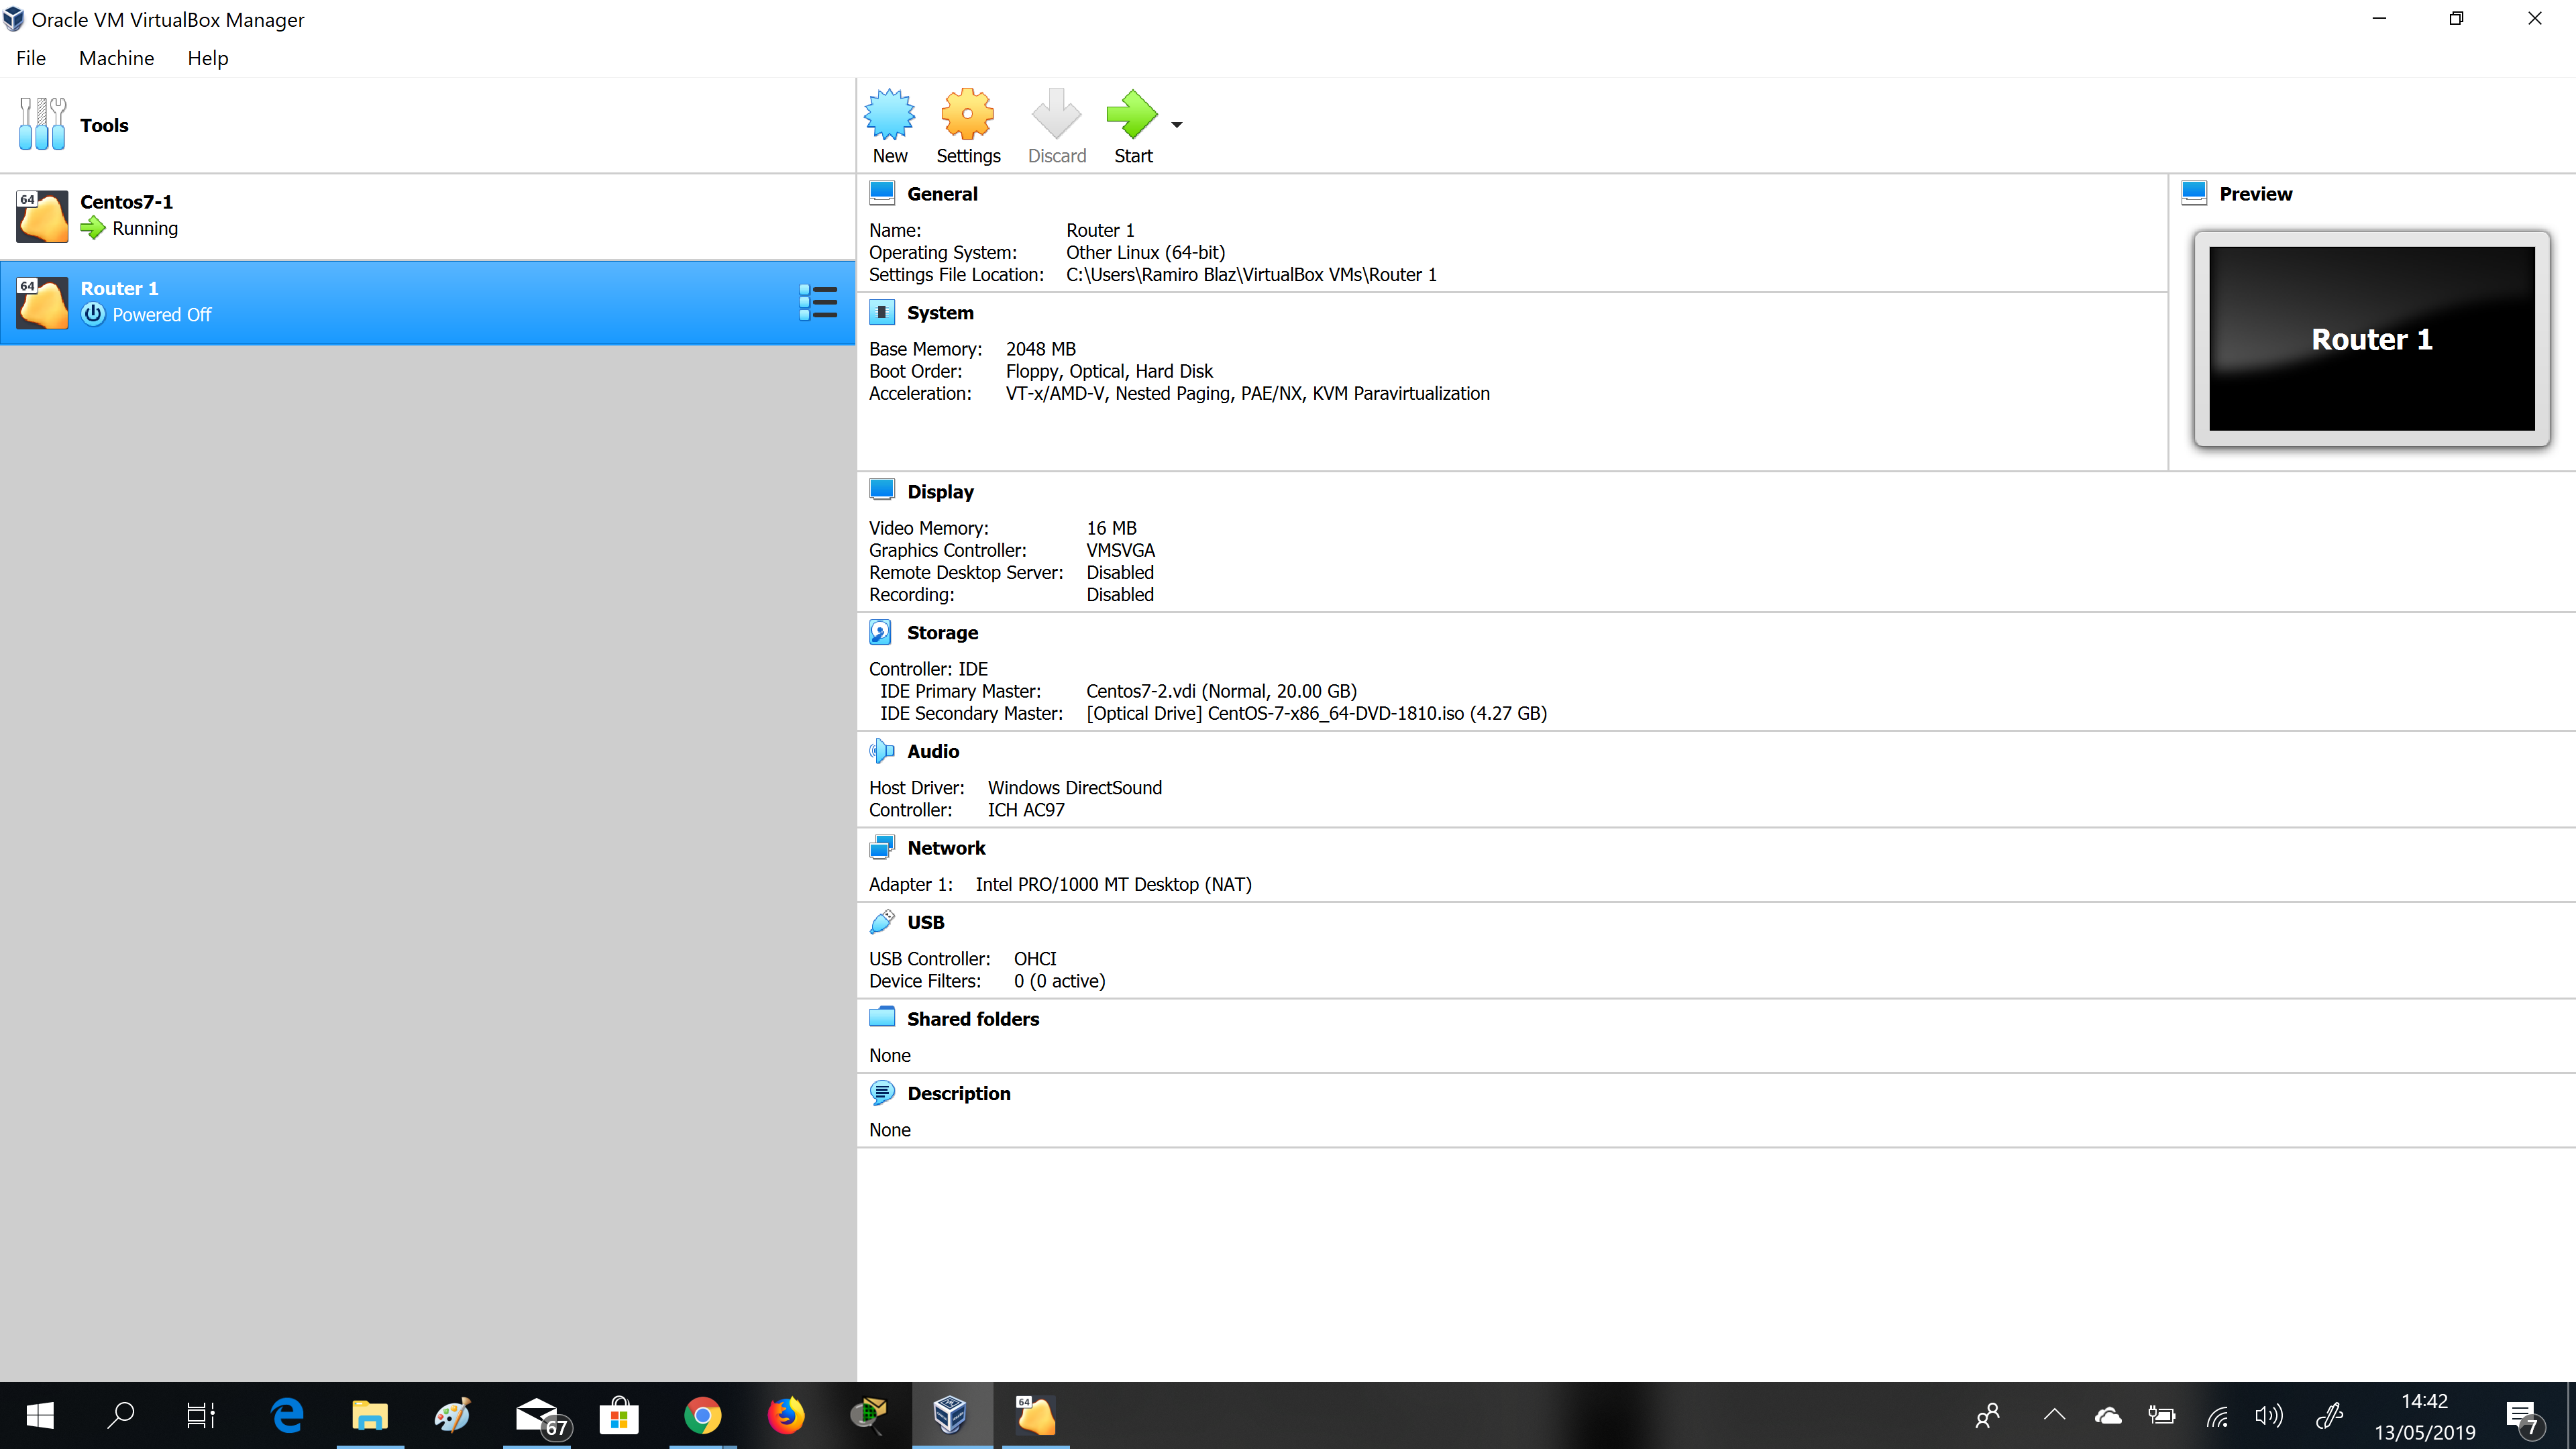
Create another VM using the instructions above, so that you have at least 2 virtual machines. Name the second one Router 1 as we will be using this VM for the next tutorial on how to 'Set up NAT to allow communication between two VMs'. We will need these VMs to clone. Your VBox Manager window should look something like the image below.
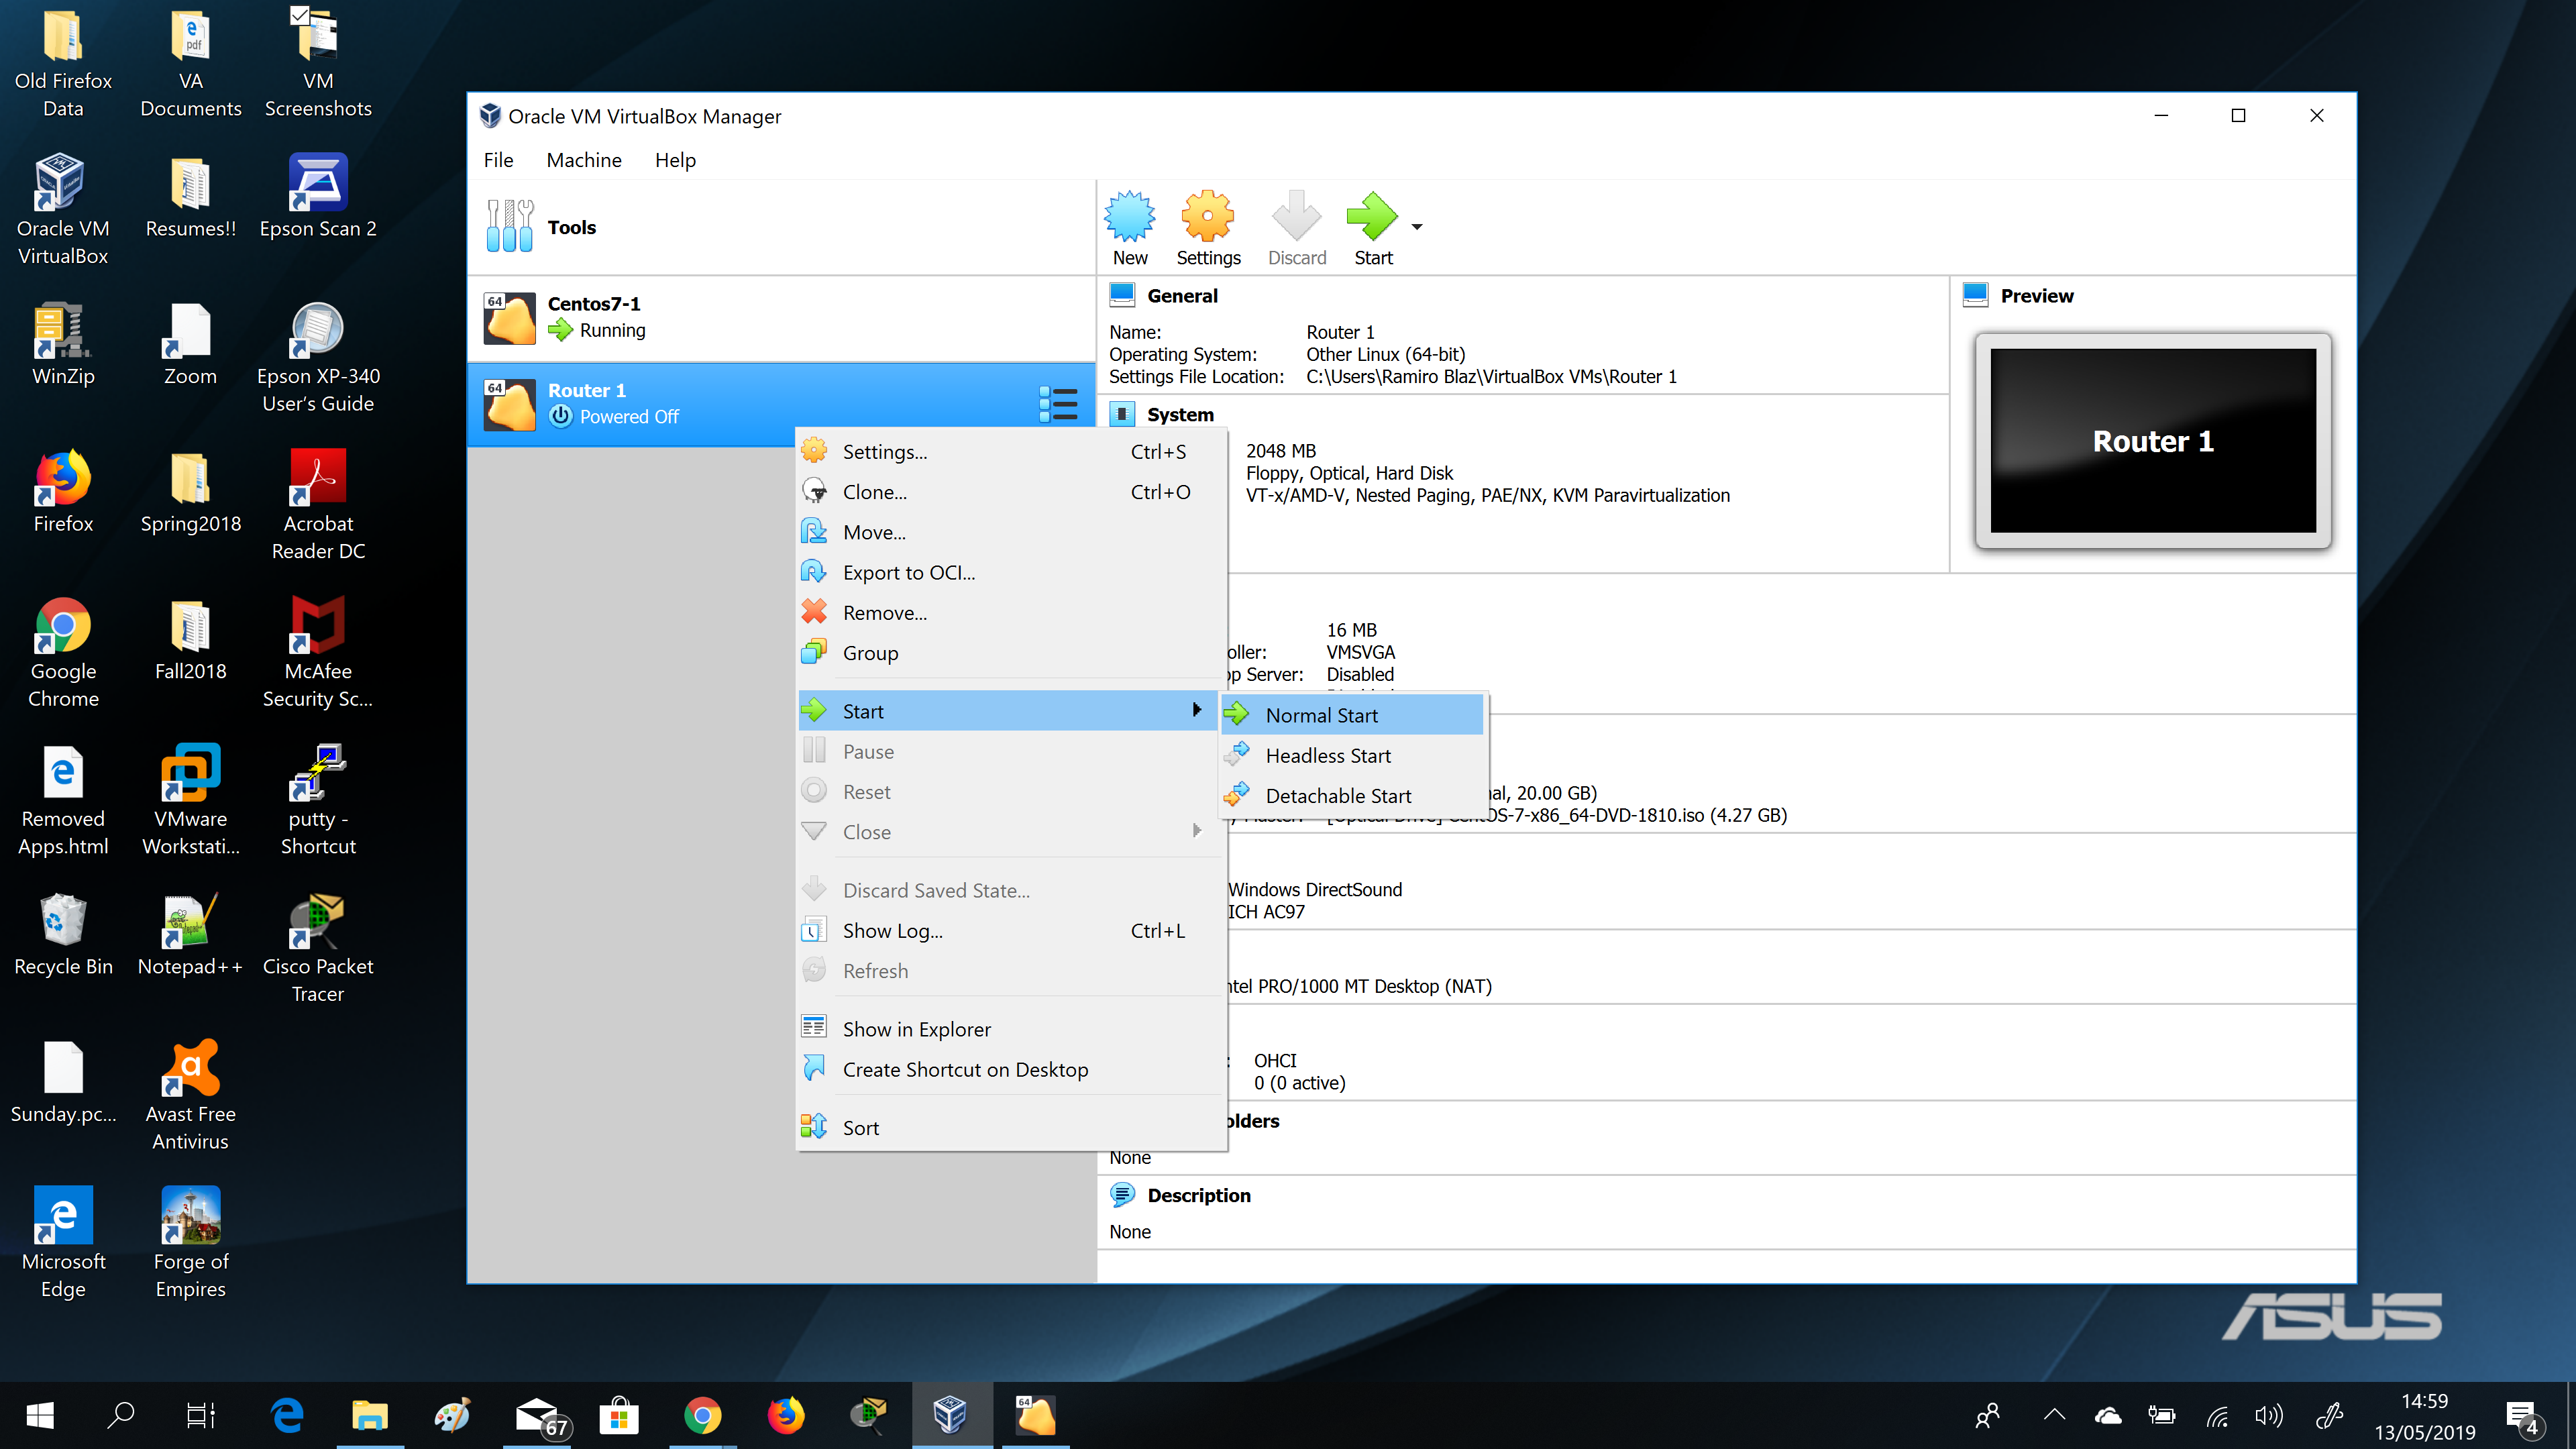
The next step is to click and highlight the machine you want to perform the installation of either your Linux (Centos7) OS or your Windows installation. In this example we are installing Centos7. You can either right click and select Start then Normal Start from the drop menu that opens or double click the power button for the virtual machine in the left pane. Your selection should look like this below.
The next window should look like what you have below which is the Centos 7 'Welcome' screen in which you select your language and country preference. Click 'Continue' to go to the next screen.
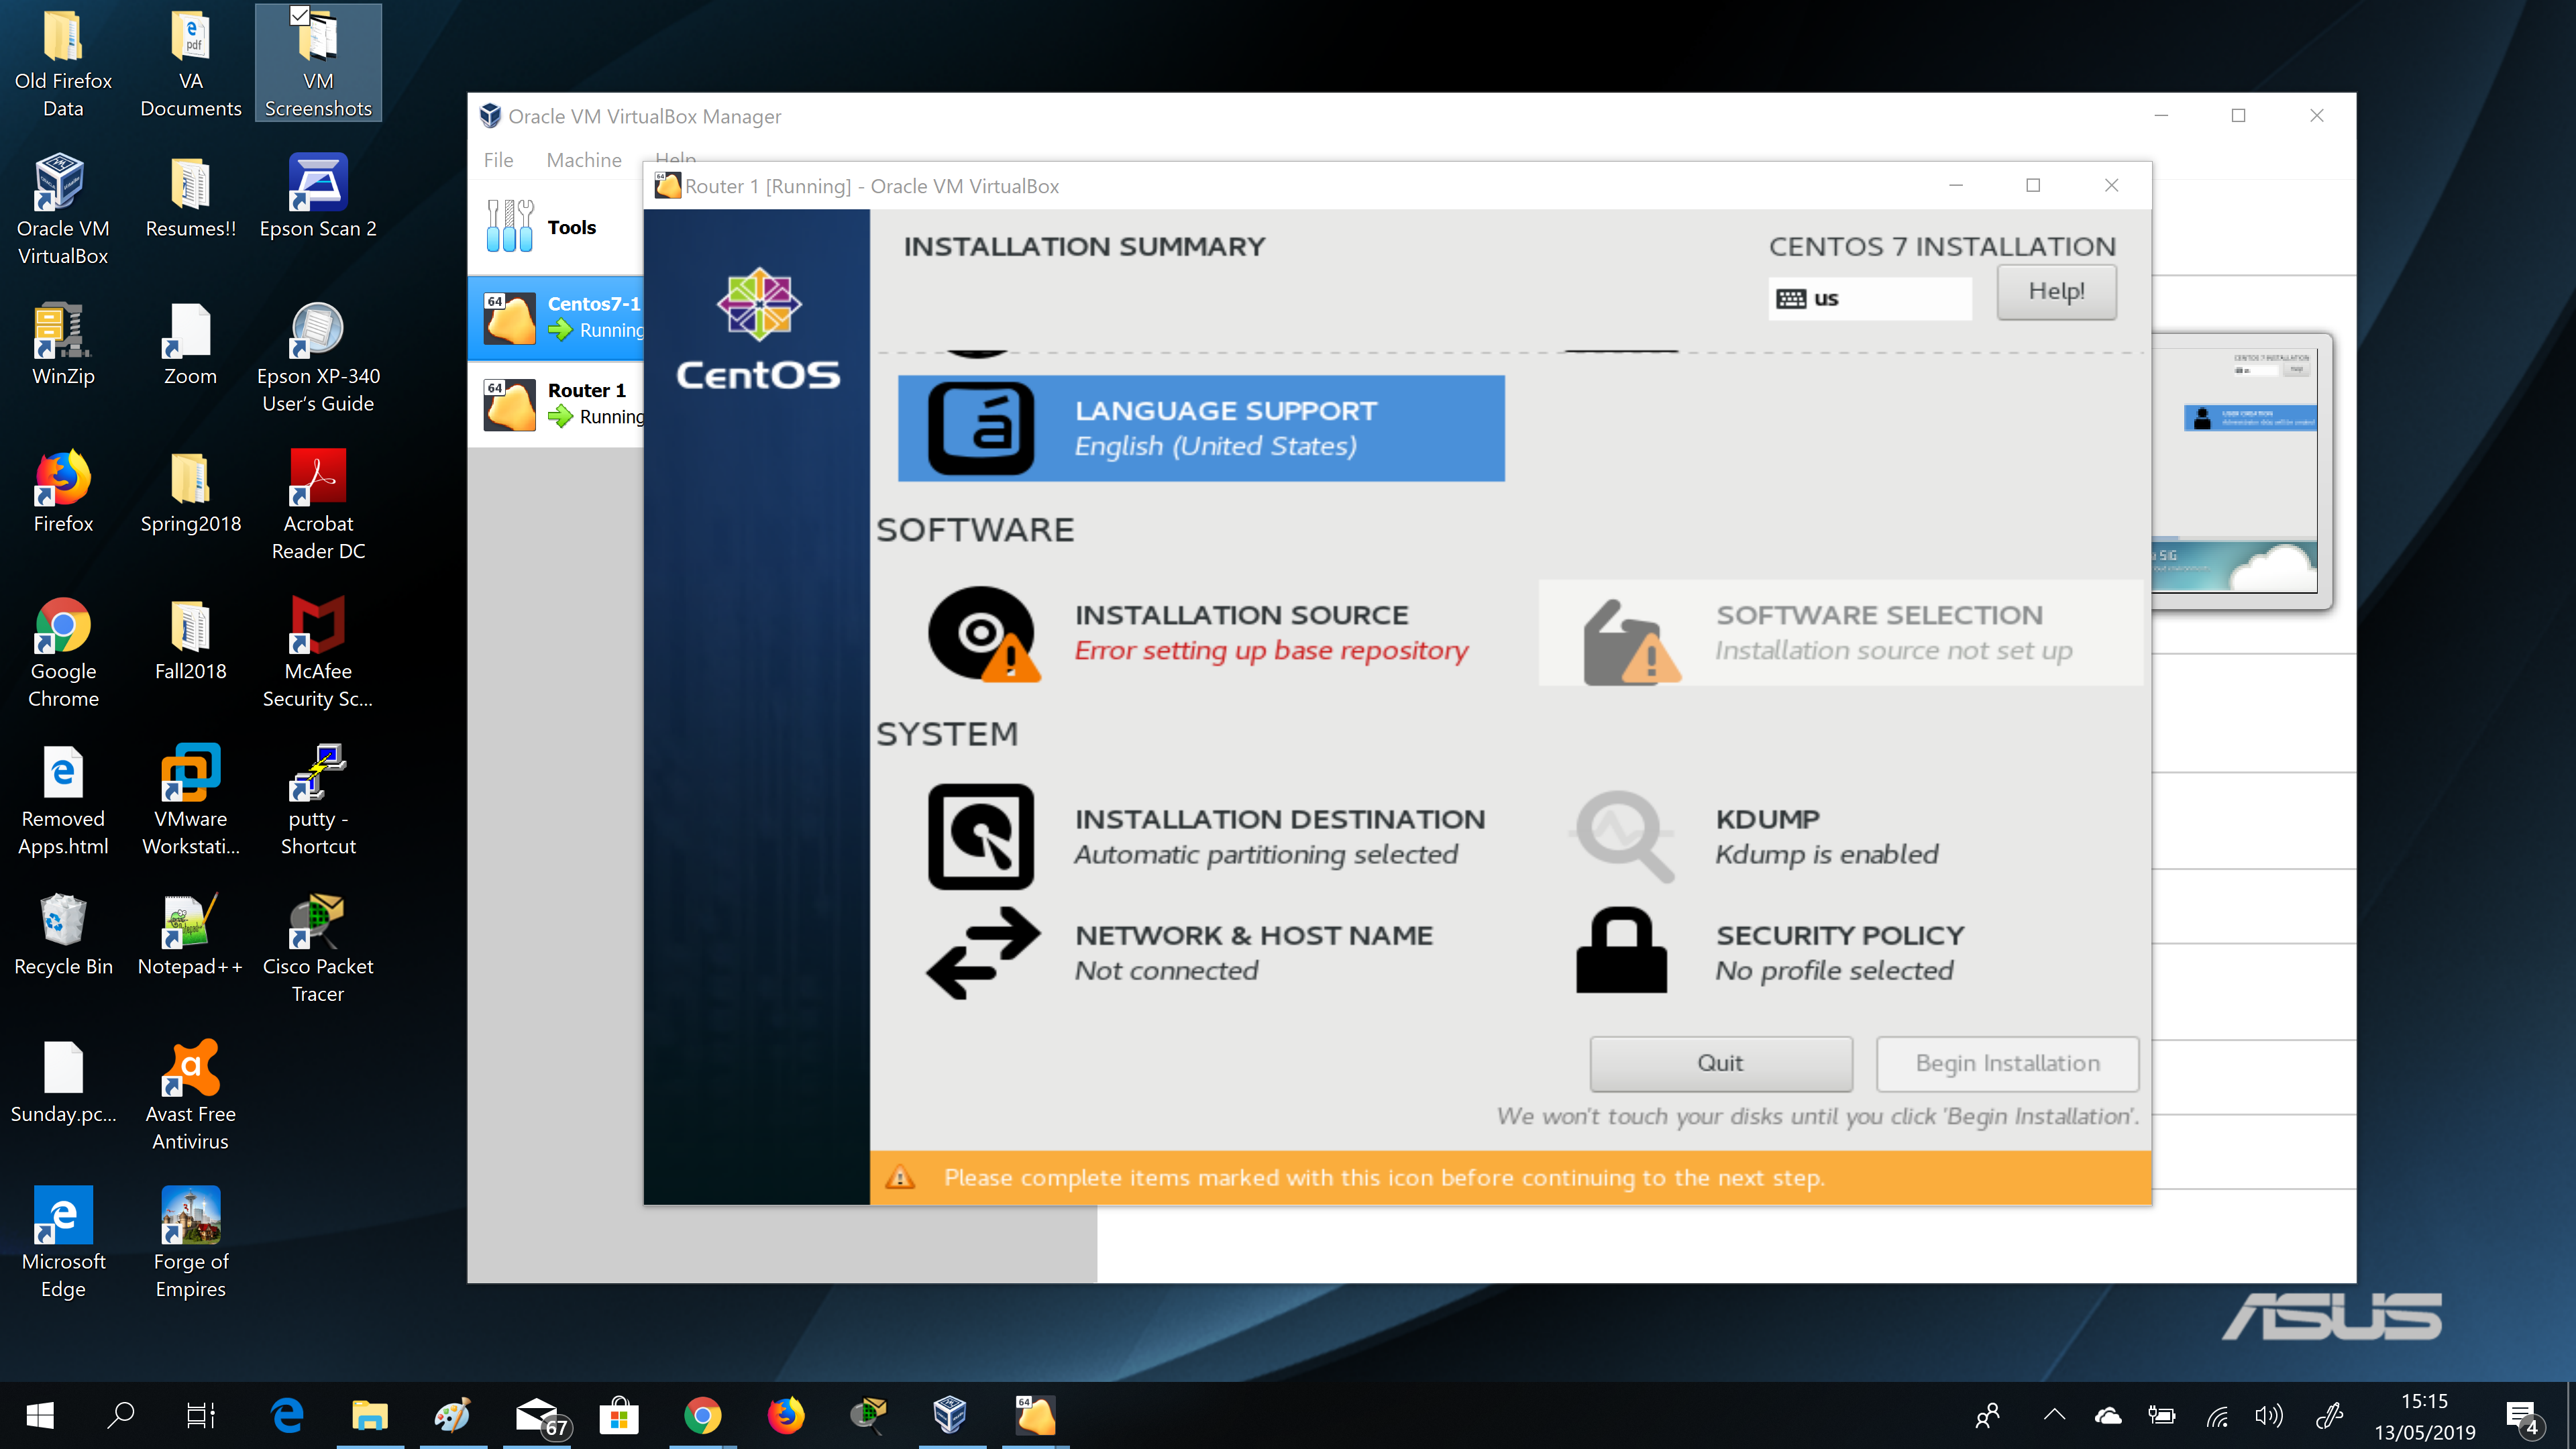
Depending on what your instructor wants you to set up as your hostname, network ip address, if you are installing a GUI etc. You would make those configurations by selecting them by clicking the areas in this window.
Troubleshooting
Issue: Trying to install CentOS 7 and the mouse works on host but when you click into the Virtual Machine, the mouse does not seem to be present or work.
Workaround/Solution: (I did not have Oracle VirtualBox 6+, so all the steps are not listed)
- Exit out and power off current Virtual Machine
- In the left pane of your VirtualBox Manager click on the appropriate Virtual Centos7 Machine to highlight.
- Click on Settings icon above the right pane
- Click on Display
- Change the graphics controller from VMSVGA to VboxVga

